BitBrowser Proxy Integration Tutorial with DataImpulse
 2026.04.17 07:45
 petro
petroBitBrowser is an antidetectable browser that uses 30+ customizable settings. Its mission is to create authentic browser fingerprint profiles. BitBrowser lets you manage browsing sessions and provides service for users from various locations around the globe. This browser works perfectly with residential proxies. Keep in mind, though, that not all proxy providers can be trusted.
Let’s take a closer look at DataImpulse and see if the setup process is beginner-friendly, so you can decide if it’s the right choice for you. DataImpulse proxy provider gives access to a large pool of residential IPs worldwide. It also includes a pay-as-you-go model and custom pricing plans depending on your specific request. Moreover, if you want to improve security for your enterprise, there's an opportunity to try premium residential proxies, which have exceptional speed and are perfect for high-demand use cases.
How residential proxies keep you anonymous
The first stage begins when you load a web page or collect information for your project. It means the process of sending a data request. Instead of connecting directly to the target site, your request passes through the residential proxy network. The proxy assigns a real residential IP from its pool, linked to a genuine ISP. After such activity, the website sees the request as coming from a legitimate home user.
Finally, the requested data returns through the proxy and reaches your device. That’s the technical side of residential proxies. Now, let’s practically test DataImpulse proxies with BitBrowser.
How to integrate residential proxies with BitBrowser
Step 1. First, open dataimpulse.com and click the Try now button. After you register, access your account by logging in. Then, keep going by clicking + Create a new order, and pick your proxy category. Proceed with Buy Now.
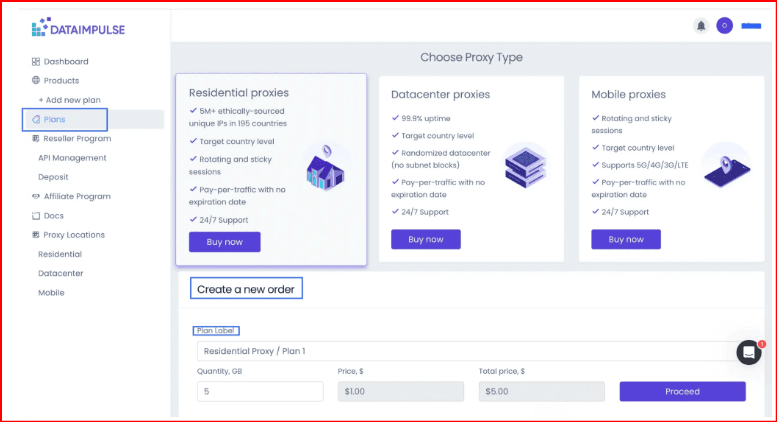
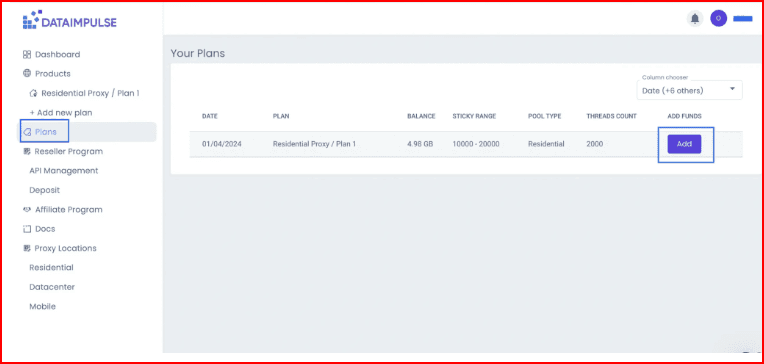
Step 2. When your first plan is active, head to the Plans tab to see its details, like when it was bought and how much traffic you have left. Click Add anytime to top it up.
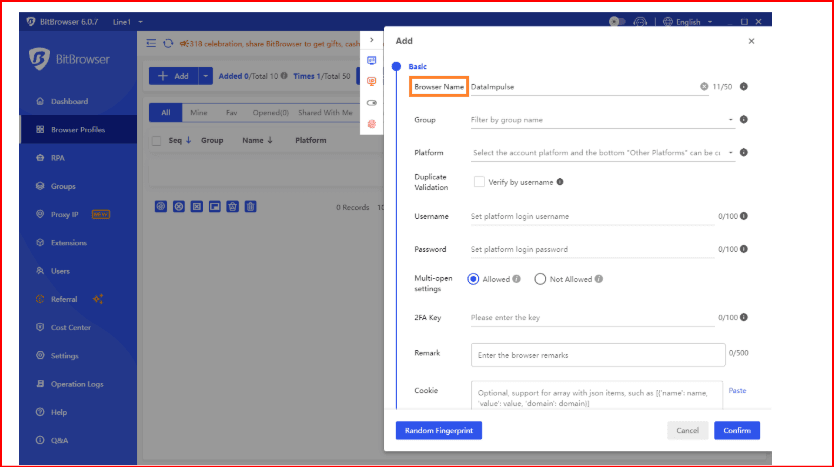
Step 3. Download BitBrowser and log in. Search for the Browser Profiles section. To add a new profile, click the relevant button +Add.

Step 4. When you click +Add, you’ll see a new window appear. There, you can complete all the information you need, like browser name, group, and platform.
Step 5. Scroll down to the Proxy section and enter your connection details. You can choose between HTTP, HTTPS, or SOCKS5 proxy types. In the fields Host/Port/Username/Password, enter the credentials from your plan on the DataImpulse dashboard.
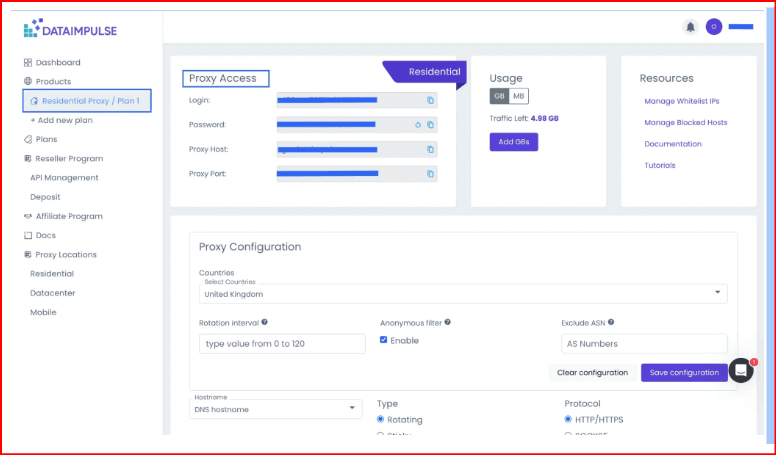
Then click Check Proxy to test the connection. Finally, click Confirm to save your profile.
Step 6. You’re almost there. The last stage is to click Open, and your profile will be launched.
Reasons to have residential proxies in your stack:
- You can run multiple accounts without triggering security or verification checks;
- Website and third parties can’t track you online;
- You’re becoming a harder target for hackers because of the safety proxies provide;
- Non-stop web scraping and data collection, as the risk of bans is minimal;
- Content that was restricted is no longer an issue due to smart routing through verified residential networks;
Managing multiple accounts also requires the highest level of cybersecurity. It’s wise to take all possible measures against cyberattacks, but adding residential proxies gives you even more online confidence. Choosing a reliable proxy provider can be tricky, as there are already so many companies on the market. Look for one that offers stability, speed, and genuine residential IPs like DataImpulse.
 Multi-Account Management
 Prevent Account Association
 Multi-Employee Management
Recommended
See More ![]()