How to Get a Free SSL Certificate for Your WordPress Website
 2025.11.09 22:27
 petro
petroSeeing the message “Your connection is not secure” on your website can feel scary — but don’t worry!
The fix is simple: add a free SSL certificate to your WordPress site.
In this step-by-step guide, you’ll learn:
✅ What SSL is
✅ Why it’s important
✅ How to get and install a free SSL certificate
✅ How to make your WordPress site fully secure
Let’s dive in!
What Is SSL?
SSL (Secure Sockets Layer) is a protocol that encrypts the connection between your visitors and your website.
This keeps sensitive information — like passwords, emails, or credit card data — safe from hackers ?️♂️.
You can spot an SSL-protected site easily:
- ? The URL starts with https:// (not http://)
- ? There’s a padlock icon next to the web address
This encryption ensures your website is trusted and secure.
Why You Need SSL on WordPress
Whether you run a blog, business site, or store — every site needs SSL. Here’s why ?
Protects data: Encrypts personal and payment info
Builds trust: Visitors feel safer on your site
Boosts SEO: Google ranks HTTPS sites higher
Prevents warnings: Chrome marks non-SSL sites as “Not Secure”
Without SSL, your site could lose visitors and credibility.
How to Get a Free SSL Certificate
The easiest way to get a free SSL is through your WordPress hosting provider.
Most top hosts now include SSL certificates (usually from Let’s Encrypt ?).
Here are some great options that include free SSL:


- DreamHost
- WordPress.com
- Rocket.net
- HostGator
If your site is hosted on one of these platforms, enabling SSL takes just a few clicks!
Example: Enabling Free SSL in Bluehost
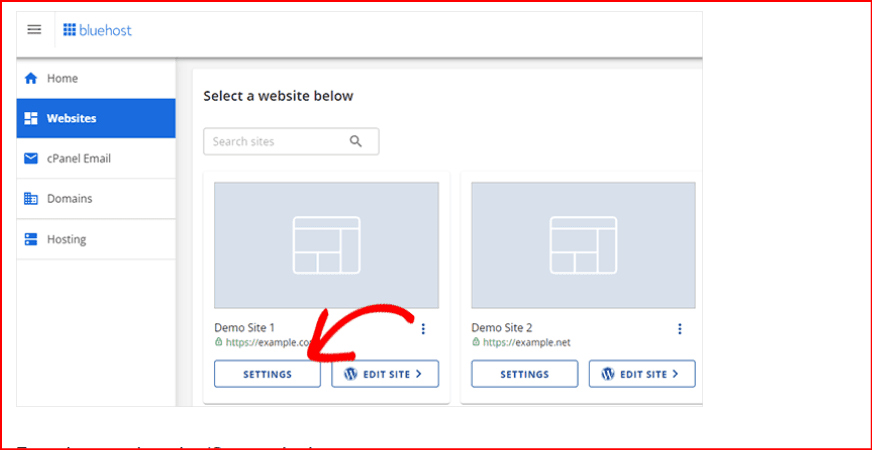
1️⃣ Log in to your Bluehost dashboard
2️⃣ Go to Websites → Settings
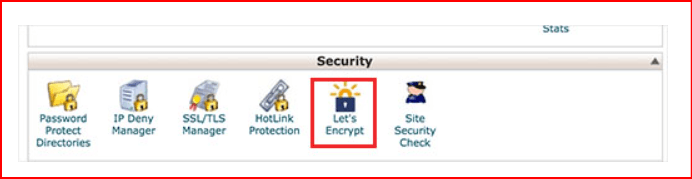
3️⃣ Click the Security tab
4️⃣ Find the SSL Certificates section
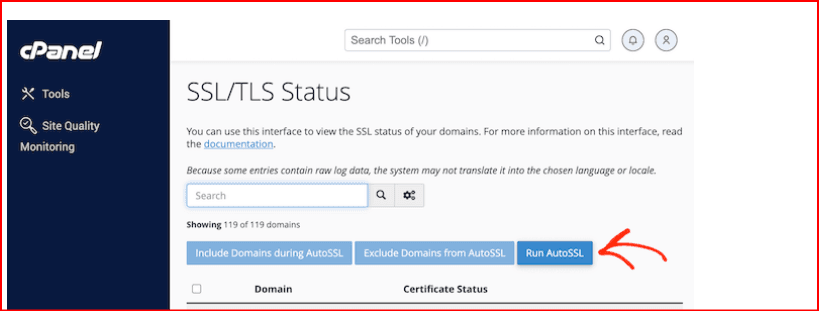
5️⃣ Toggle the switch to Enable Free SSL
Bluehost will automatically install your SSL certificate — no coding needed!
Don’t Have Free SSL from Your Host?
No problem! You can use Let’s Encrypt, a free, open-source SSL provider .
However — setting it up manually can be tricky if you’re new to WordPress.
You’ll need some technical setup (like using Certbot or your host’s control panel). Pro Tip: If you’re not comfortable with manual steps, choose a hosting provider that includes free SSL to save time and avoid errors.
Set Up SSL on Your WordPress Site
Once your SSL certificate is active, update your WordPress settings to use HTTPS.
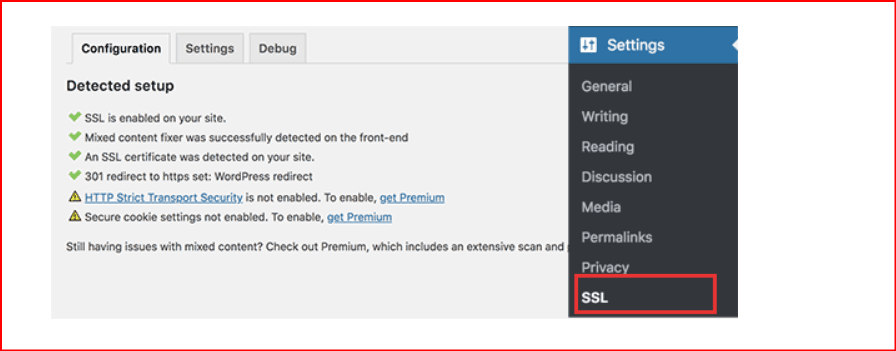
Option 1: Use the Really Simple SSL Plugin (Recommended)
1️⃣ Go to Plugins → Add New
2️⃣ Search for Really Simple SSL
3️⃣ Install & Activate it
4️⃣ The plugin automatically detects your SSL and updates your URLs
Done! Your site now loads securely via HTTPS.
Option 2: Manual Setup (Advanced)
If you prefer to skip plugins, you can:
- Go to Settings → General
- Change your WordPress Address (URL) and Site Address from
http://tohttps:// - Update internal links and media URLs
This gives you a slightly faster site, but requires more effort.
Fixing “Not Fully Secure” Warnings
Sometimes, you might still see a “Connection not fully secure” warning
This usually means some files (like images or scripts) still load via HTTP.
To fix this:
Use your browser’s Inspect tool → find insecure links
Replace them with HTTPS versions
The Really Simple SSL plugin can fix most of these automatically.
Frequently Asked Questions (FAQs)
? What is an SSL certificate?
It’s a digital file that encrypts communication between your website and visitors.
? How can I check if my site has SSL?
Look for HTTPS in your URL and a padlock icon in your browser.
? Do I really need SSL?
Absolutely ✅. It’s vital for security, SEO, and user trust.
? Is SSL free?
Yes! Many hosting companies offer Let’s Encrypt SSL for free.
? How does SSL work?
It uses encryption keys to scramble data during transfer so hackers can’t read it.
Bonus: Strengthen Your WordPress Security
Adding SSL is just step one. Here are more ways to make your site bulletproof
Automated Backups – Use plugins like UpdraftPlus or Jetpack Backup
Two-Factor Authentication – Add extra login protection
Firewall Protection – Use Cloudflare or Sucuri to block attacks
Regular Security Audits – Keep plugins, themes, and WordPress updated
Final Thoughts
Adding a free SSL certificate is one of the simplest and smartest ways to protect your WordPress site ?️.
It boosts trust, SEO, and user confidence — all for zero cost.
If your host doesn’t offer free SSL, consider switching to one that does.
Secure your site today and show visitors that their data is safe with you ?
 Multi-Account Management
 Prevent Account Association
 Multi-Employee Management
Recommended
See More ![]()