How to Set Up BitBrowser With NinjaProxy
 2025.07.11 10:23
 BitBrowser
BitBrowser is an anti-detect browser that spoofs your device information to make you anonymous on the web. It can also be used to manage multiple online accounts without the risk of getting banned. You can also pair a proxy service, such as NinjaProxy, to assign each browser profile a unique IP address.
NinjaProxy - Best Proxy for Anonymous Web Access
When you look at the proxy space, very few proxy services have withstood the test of time. NinjaProxy is a proxy with a vast experience in delivering proxies to the masses, thanks to a long service of 15 years.
Its residential proxies are some of the best for integrating in BitBrowser. They’re static proxies with residential IP addresses, giving you a much higher IP reputation than datacenter proxies, and better reliability than dynamic residential proxies.
All proxy plans support an unlimited data policy, which should come in handy when dealing with large-scale projects. Moreover, the proxy plans are also affordable, starting at just $15/month for 10 shared IPs.
How to Set Up NinjaProxy
- The first step is to ensure you have an active NinjaProxy plan.
- Get the BitBrowser app for desktop from our Download page.
- Go through the installation process. Then, log in to the app with your user credentials.
-
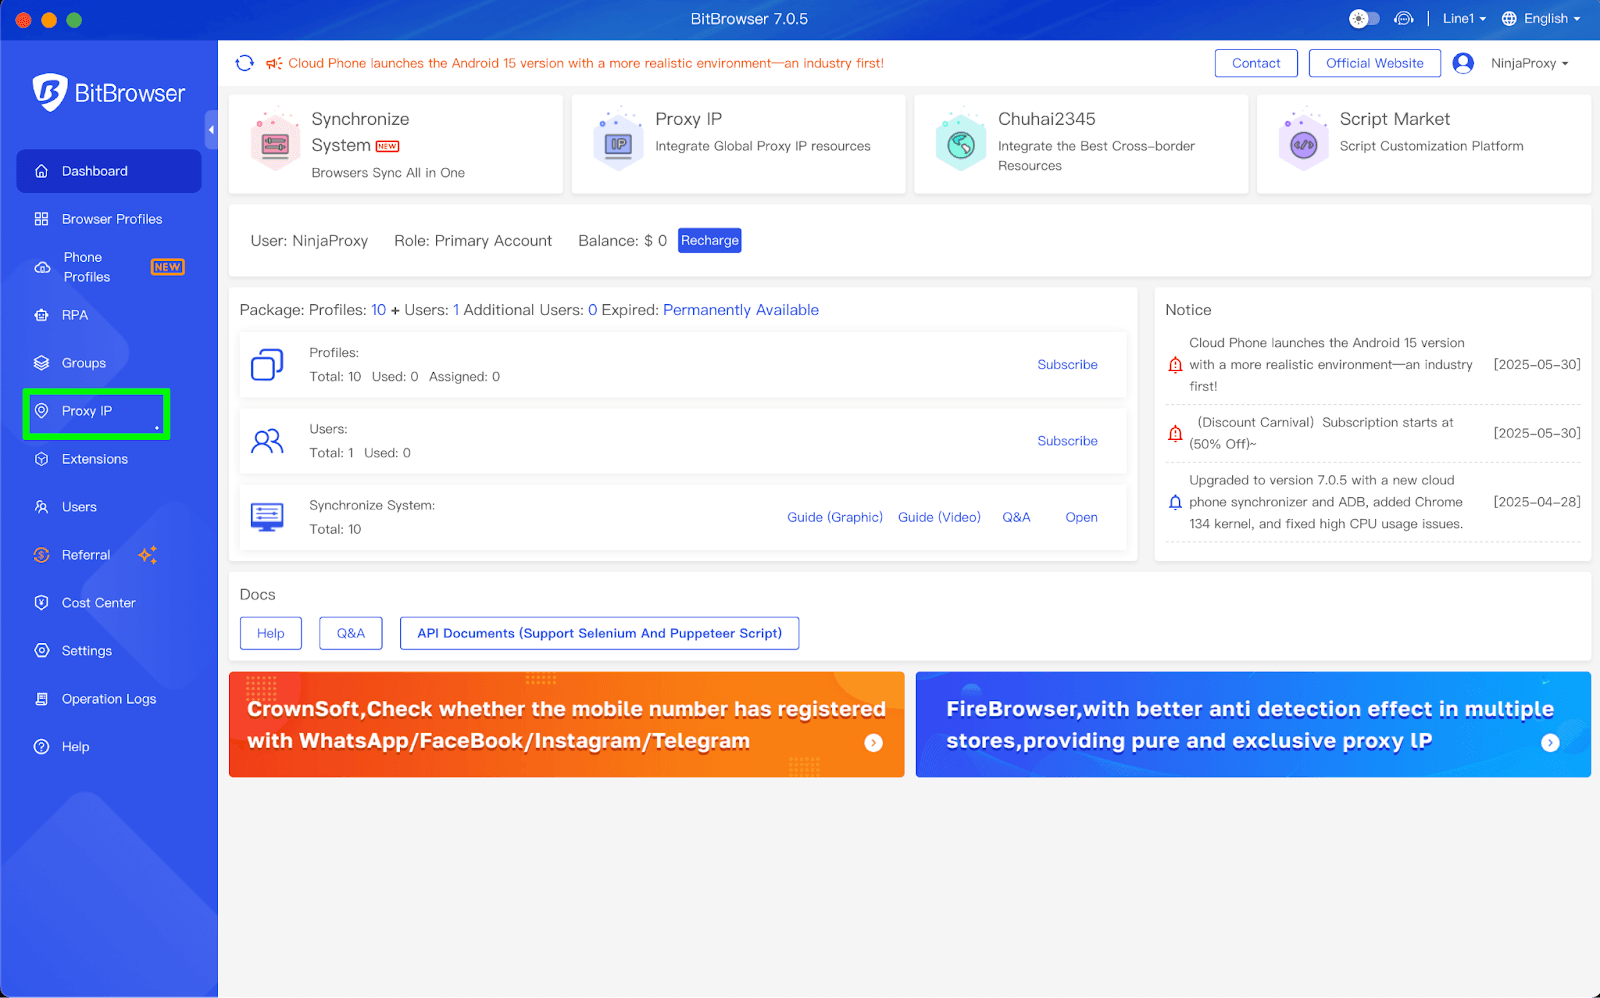
On the home page, the menu on your left is where you navigate to the different settings and functionalities of BitBrowser. Go to Proxy IP > Proxy Management.

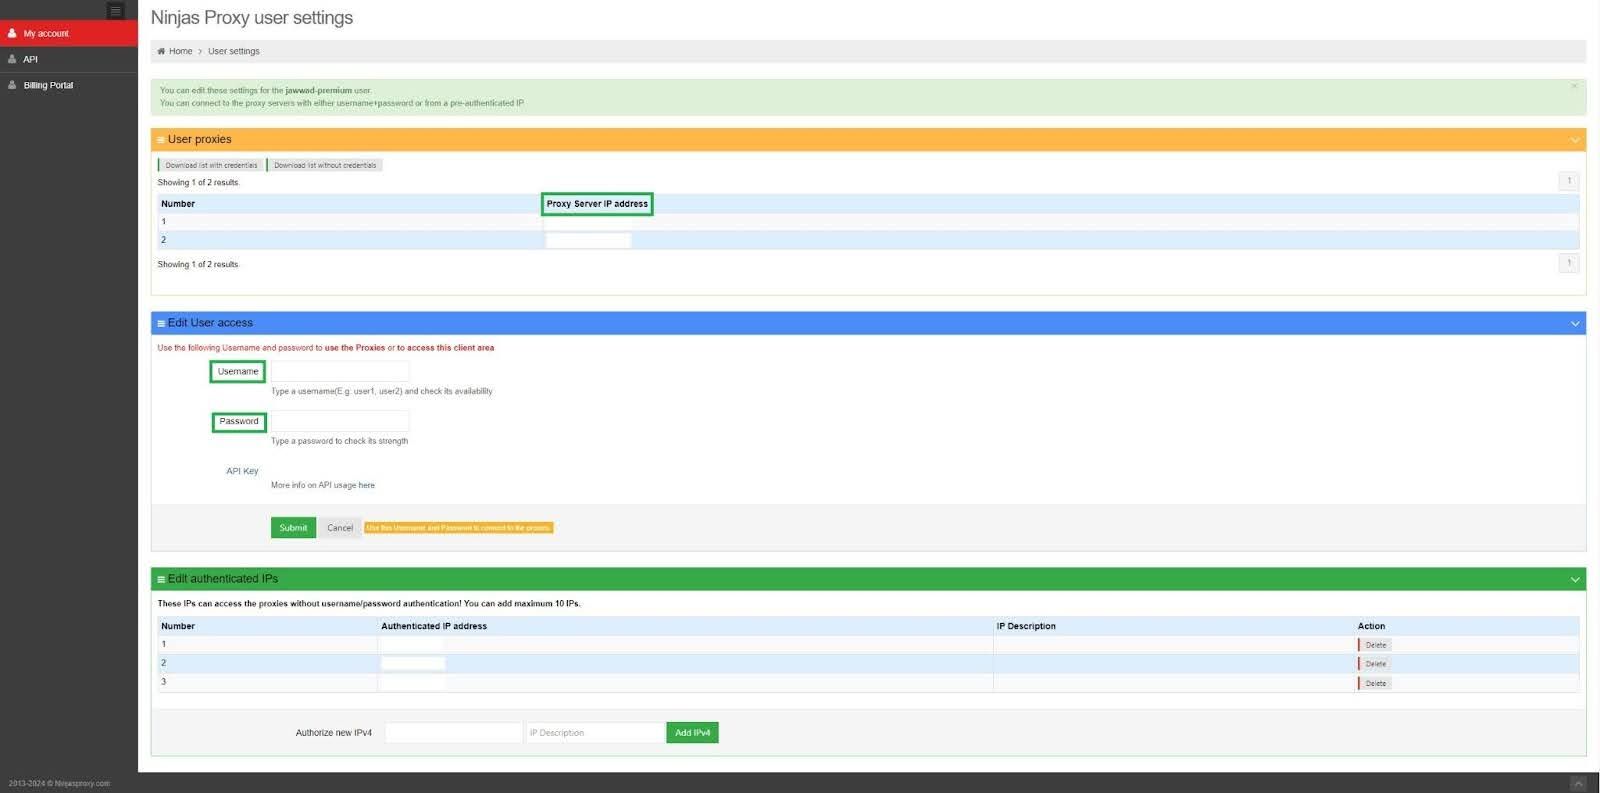

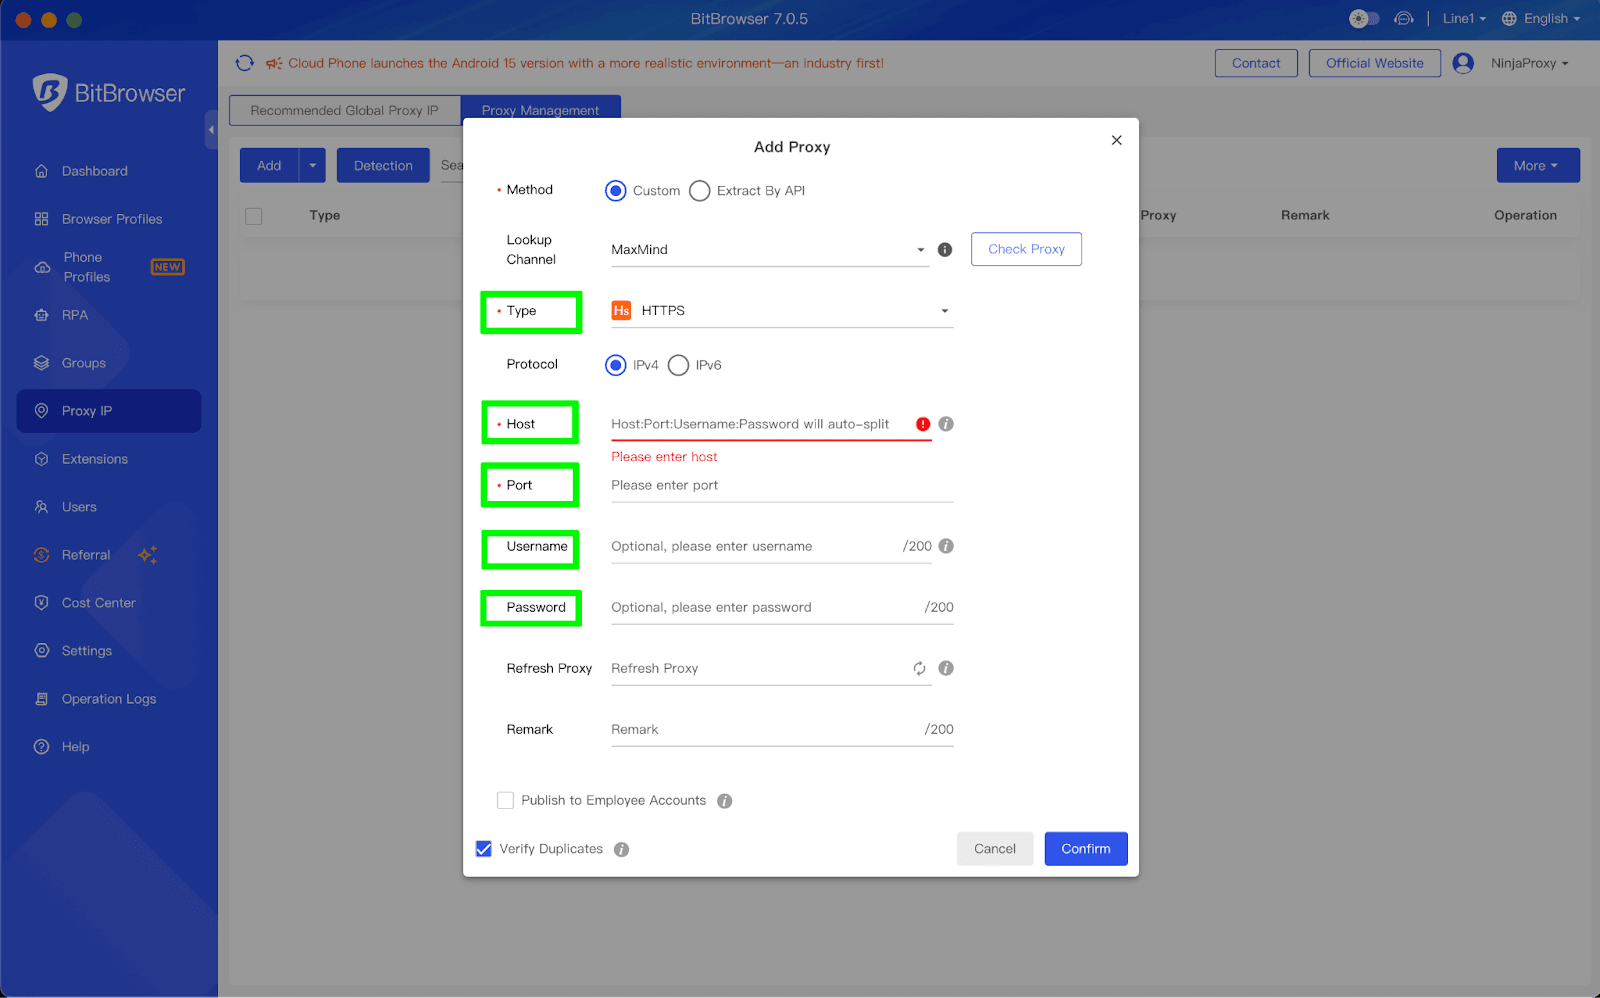
Save the proxy profile.
The proxy server can now be used with any browser profile you create.
To pull up saved proxies, go to Browser Profiles > Add. Scroll down to the Proxy section and switch to Proxy Management. Select a saved proxy from the drop-down menu in the Proxy field.
 Multi-Account Management
 Prevent Account Association
 Multi-Employee Management
Recommended
See More ![]()