How to Set Up Roundproxies in BitBrowser (Step-by-Step Guide)
 2025.12.03 15:01
 YT.Shi
Most people think managing multiple accounts is a nightmare. They create a few accounts. They get banned. They blame the platform. But the platform isn't the problem. Their setup is. With the right tools, you can run unlimited accounts without a single ban. No stress. No guesswork. No wasted time. Here's exactly how to do it using BitBrowser and Roundproxies.
Part 1: What is BitBrowser?
BitBrowser is a powerful anti-detect browser that lets you manage multiple accounts without needing multiple devices.
It works by simulating different computer setups for each browser session. Different hardware. Different fingerprints. Different everything. To platforms, each profile looks like a completely separate person on a completely separate machine.
The result? No account association. No bans. No headaches.

Here's what makes BitBrowser stand out:
It properly leverages proxy IPs and provides deep customization for browsing sessions — giving you a level of anti-detection that most tools can't match.
BitBrowser has passed 60+ fingerprint detection tests. The same tests platforms use to catch fake accounts.
The free version comes packed with features:
· Unlimited browser profiles
· Team collaboration with role-based permissions
· Cookie import/export
· Chrome extension support
· Secure cloud storage for your profiles
Need more power? Paid plans unlock additional features like batch operations and advanced fingerprint control.
BitBrowser also makes teamwork seamless. Assign roles, set permissions, and manage accounts across your entire team from one dashboard.
It's powerful. It's proven. And it works.
Part 2: How to Set Up RoundProxies in BitBrowser
Now let's connect your RoundProxies proxies to BitBrowser.
Two options: single proxy setup or batch proxy setup.
Option A: Set Up a Single Proxy
Step 1: Download and Install BitBrowser
Go to the BitBrowser website and click Download.
Choose the right version for your platform (Windows, Mac). Run the installer.
Done.
Step 2: Create Your Account
After installation, BitBrowser will prompt you to create an account or log in.
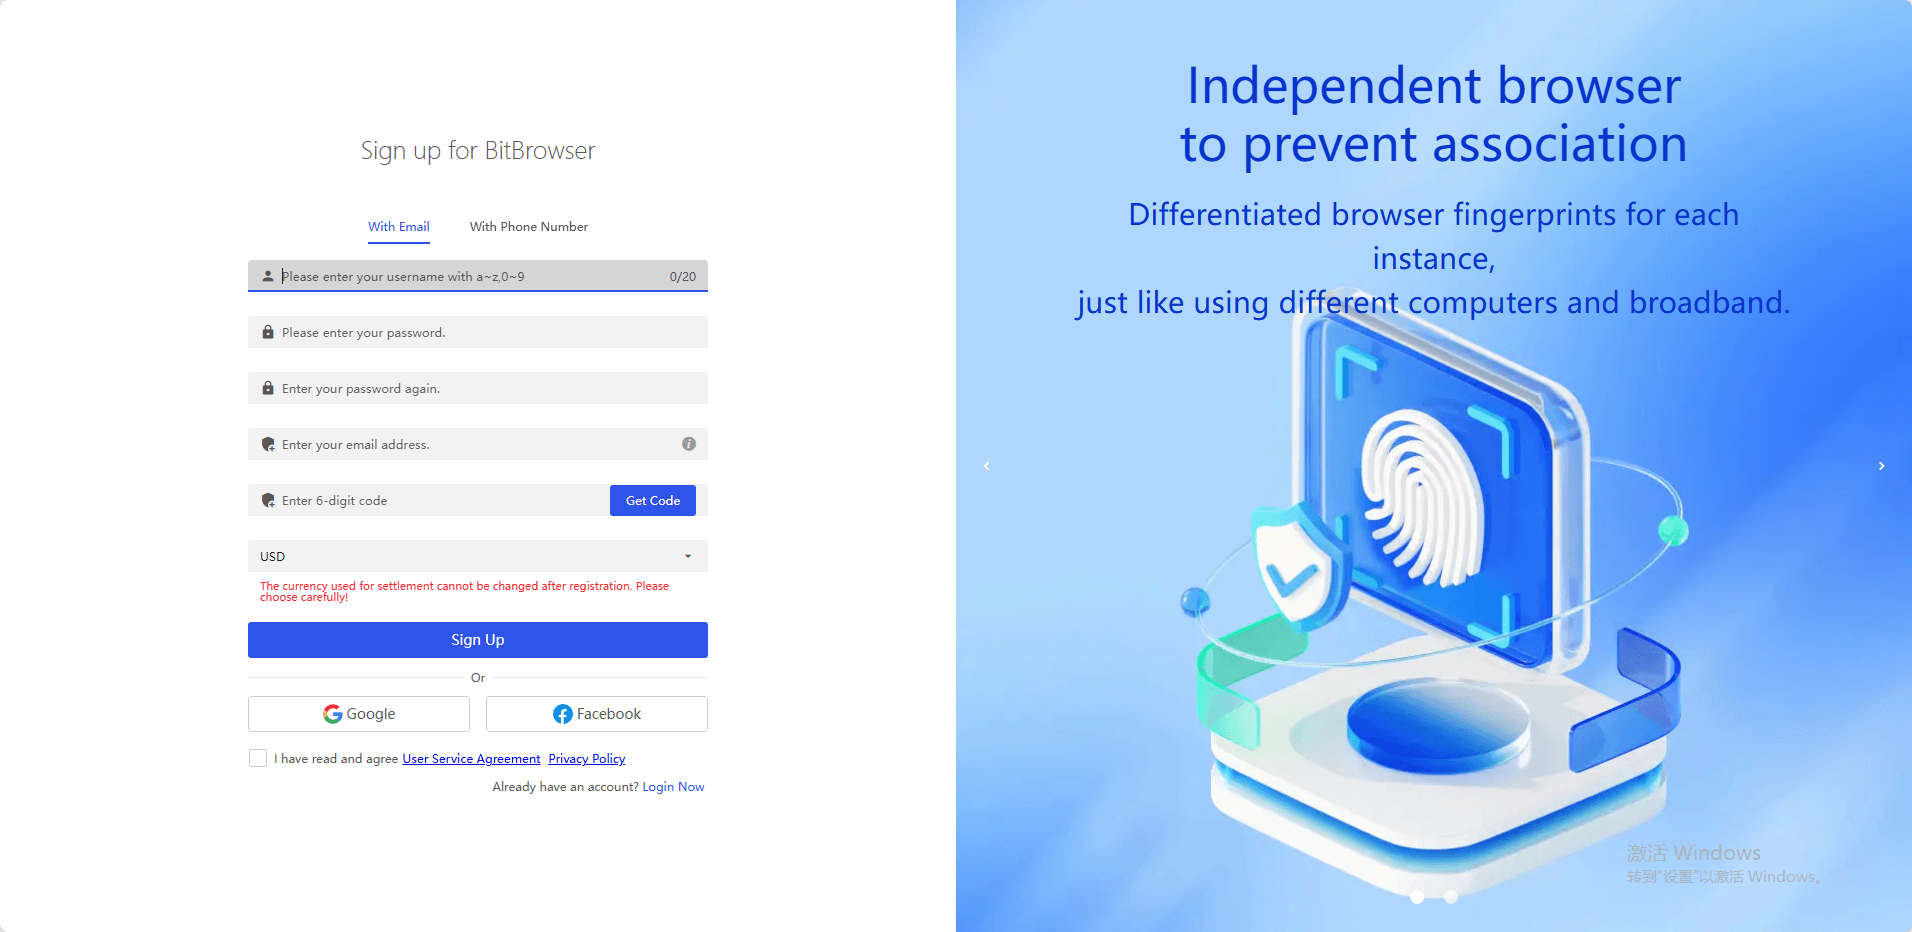
Enter your details. Sign up.
Step 3: Create a New Browser Profile
Once logged in, navigate to the Browser Profiles tab.
Click the + Add button to create a new profile.
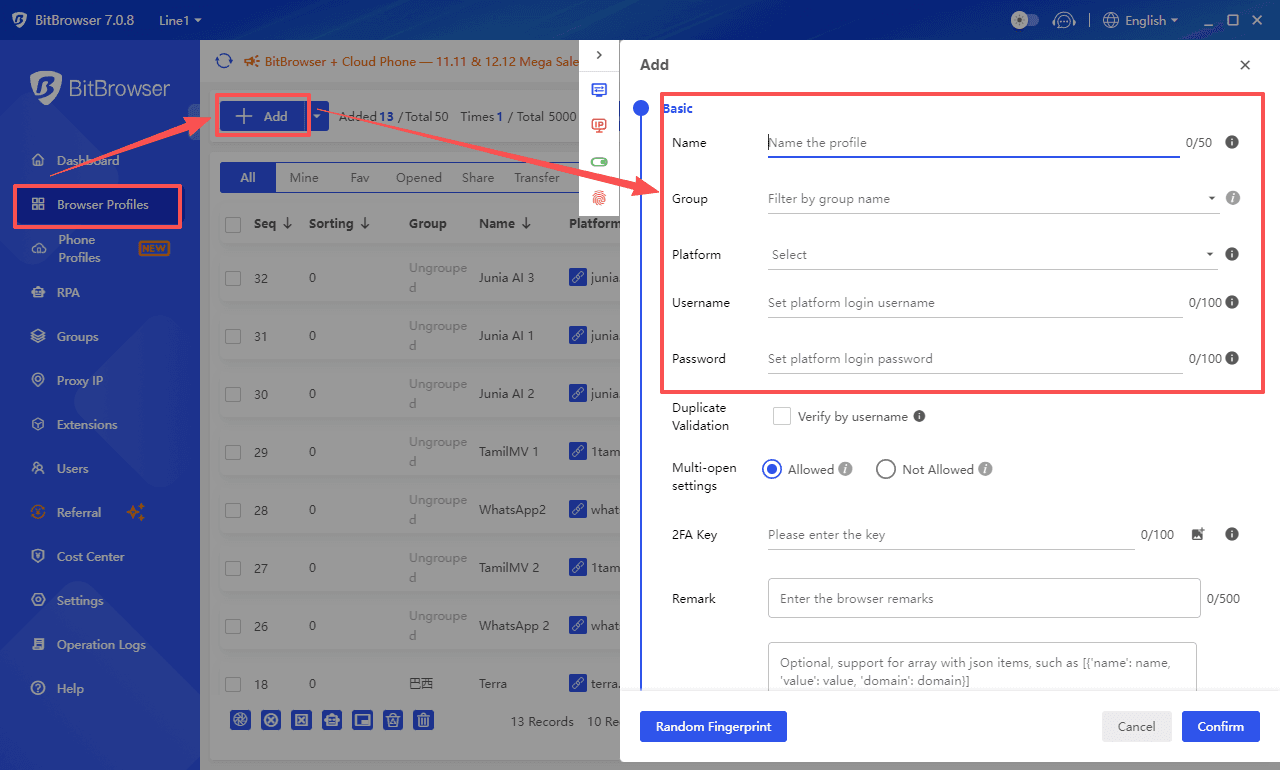
Step 4: Fill in Basic Information
Give your profile a name (e.g., "Account 1" or "US Profile").
Select a group if you want to organize your profiles. Add a 2FA key if needed.
This section is optional but helps keep things organized.
Step 5: Navigate to Proxy Settings
Scroll down to the Proxy section.
Select Custom to enter your proxy details manually.
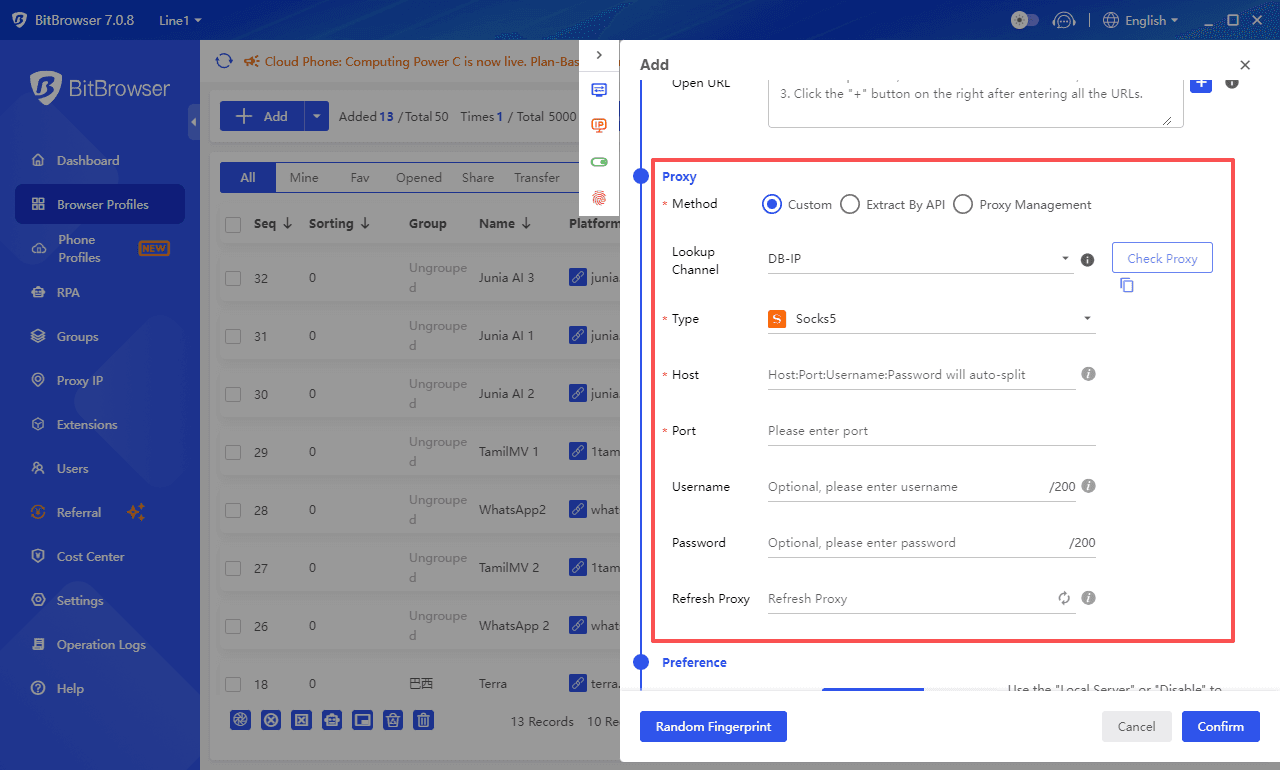
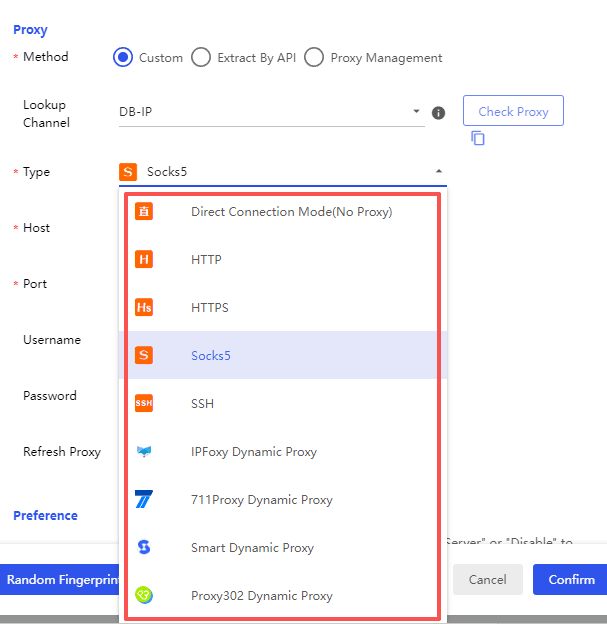
Step 6: Choose Your Proxy Type
Click the Protocol dropdown.
Select HTTP, HTTPS, or SOCKS5 depending on your RoundProxies plan.
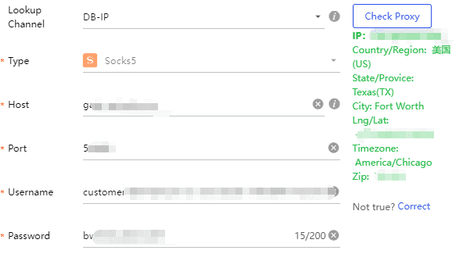
Step 7: Enter Your RoundProxies Details
You can enter the proxy info two ways:
Option 1 — Single line format:
Paste everything into the Host field like this:
IP:Port:Username:Password
BitBrowser will automatically separate it into the correct fields.
Option 2 — Enter manually:
· Host: Your RoundProxies IP address
· Port: The port number provided
· Username: Your RoundProxies username
· Password: Your RoundProxies password
Step 8: Check Proxy
Click the Check Proxy button in the top right corner.
If configured correctly, you'll see your new IP details appear on the right side of the screen.
Green light? You're good.
Step 9: Save and Launch
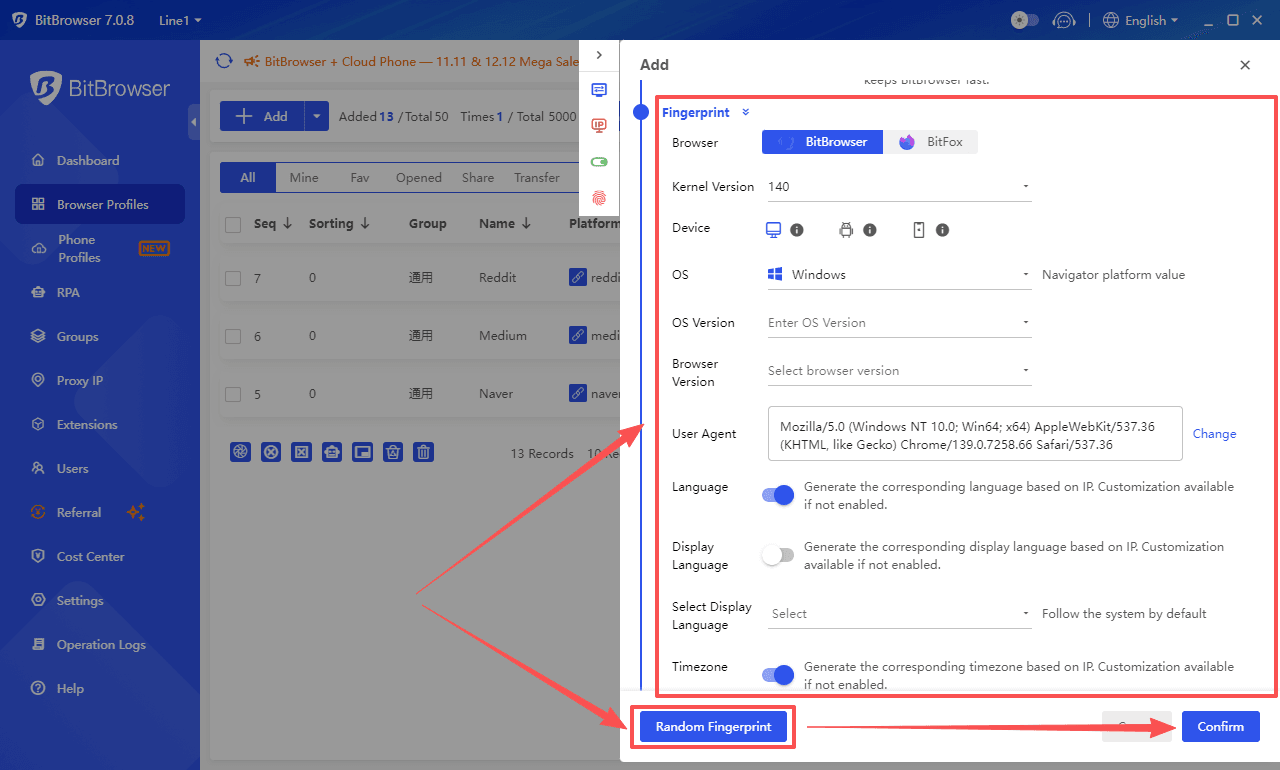
In the browser fingerprint settings, manually select the browser configuration options you need or choose "Random Fingerprint" to generate a random, realistic browser fingerprint.
Click Confirm to save your profile.
Back on the Browser Profiles page, click Open next to your new profile.
BitBrowser loads your settings and launches a browser with your custom proxy. You're now browsing undetected.
Option B: Set Up Batch Proxies
Got a list of proxies? Import them all at once.
Step 1: Prepare Your Proxy List
Create a text file with your proxies in this format:
1. Open Notepad (or any plain text editor such as Notepad++, VS Code) on your computer.
2. Ensure each line follows this exact format:
IP:Port:Username:Password
Example:
192.168.1.10:8080:user1:pass123
103.85.67.21:8888:admin:abc@2024
Notes:
· Only one proxy per line. Do not add extra spaces or symbols.
· If a proxy does not require authentication, you may leave the username and password fields blank (some software versions may require a placeholder like -; please refer to the software prompts).
· When saving the file, choose the .txt format. It is recommended to name it proxy_list.txt and save it in an easy-to-find location (e.g., your Desktop).
Step 2: Access Batch Import
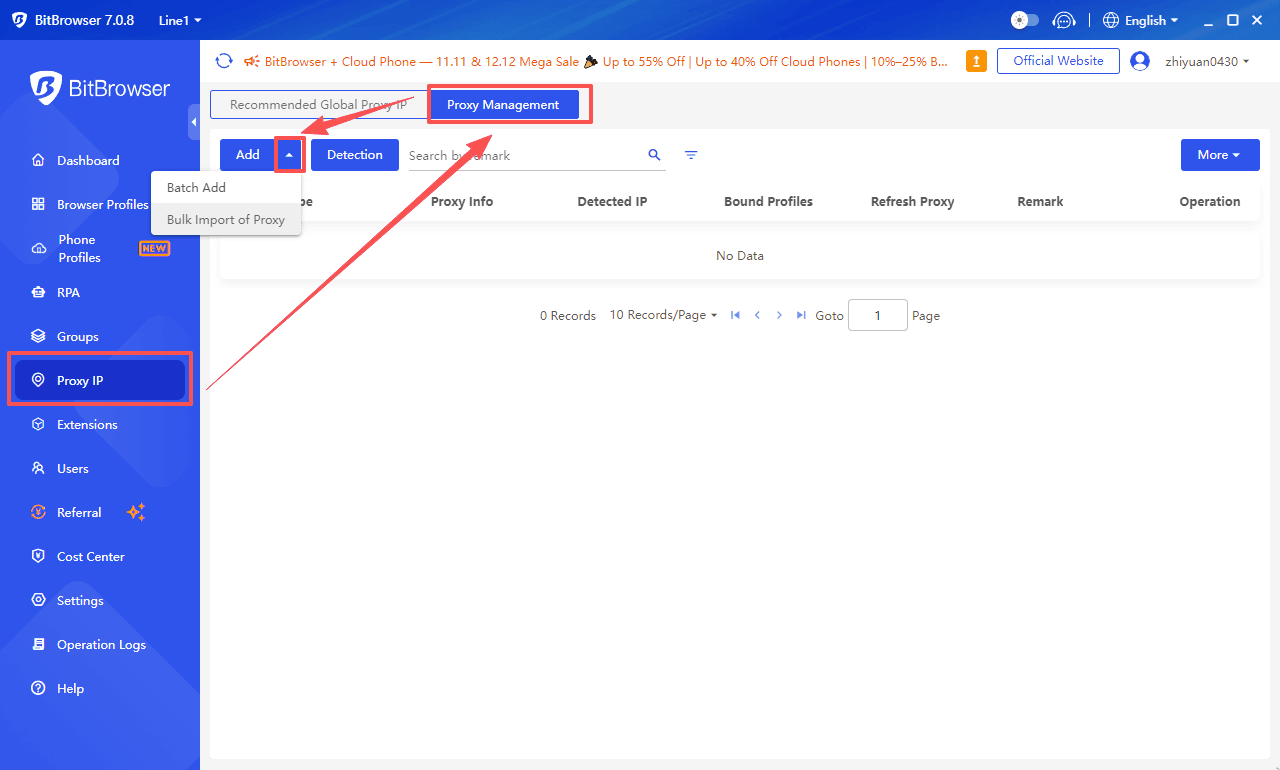
Open the BitBrowser main window and click "Proxy IP" (or similar name) in the left menu bar.
Switch to the "Proxy Management" tab at the top.
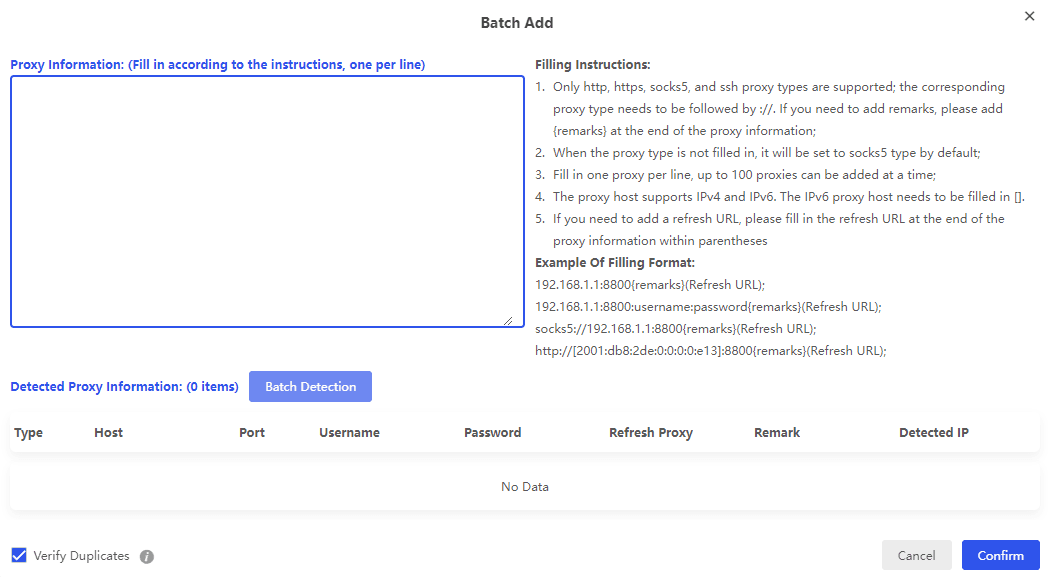
Locate the "Batch Add" button; clicking it will bring up a pop-up window.
Step 3: Paste Your Proxies
Paste your entire proxy list into the field.
Filling Instructions:
1. Only http, https, socks5, and ssh proxy types are supported; the corresponding proxy type needs to be followed by ://. If you need to add remarks, please add {remarks} at the end of the proxy information;
2. When the proxy type is not filled in, it will be set to socks5 type by default;
3. Fill in one proxy per line, up to 100 proxies can be added at a time;
4. The proxy host supports IPv4 and IPv6. The IPv6 proxy host needs to be filled in [].
5. If you need to add a refresh URL, please fill in the refresh URL at the end of the proxy information within parentheses
Example Of Filling Format:
192.168.1.1:8800{remarks}(Refresh URL);
192.168.1.1:8800:username:password{remarks}(Refresh URL);
socks5://192.168.1.1:8800{remarks}(Refresh URL);
http://[2001:db8:2de:0:0:0:0:e13]:8800{remarks}(Refresh URL);
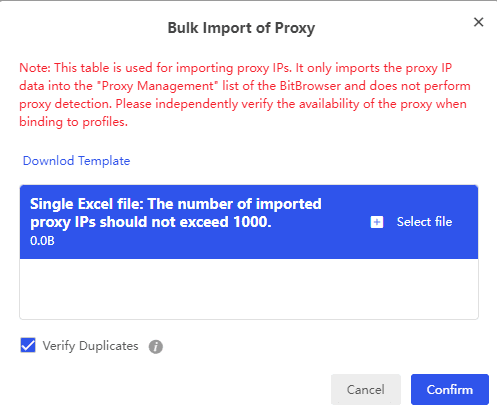
Alternatively, if you have your list in an Excel file, click Batch Import of Proxy to upload the file directly.
Step 4: Batch Test
Click to test all proxies at once.
Don't skip this. It confirms every proxy is working before you start creating profiles.
Step 5: Use Your Proxies
Now when you create new browser profiles, you can select any proxy from your Proxy Management list instead of entering details manually.
Fast. Clean. Efficient.
Why This Setup Works
Here's what happens when you combine BitBrowser + RoundProxies ISP proxies:
· Unique fingerprints → Platforms can't link accounts by device
· Clean ISP proxies → Platforms can't link accounts by IP
· Separate profiles → Each account lives in its own isolated environment
You could run 50 accounts from the same laptop. To platforms, they look like 50 different people in 50 different locations.
Invisible. Undetectable. Unstoppable.
The Bottom Line
Stop getting banned. Start setting up properly.
1. Download BitBrowser (free to start)
2. Grab ISP proxies from RoundProxies
3. Follow the steps above
4. Run unlimited accounts without fear
The setup takes 5 minutes. The results last forever.
 Multi-Account Management
 Prevent Account Association
 Multi-Employee Management
Recommended
See More ![]()