Grass Airdrop Season 2 Guide 2026: How to Claim Your 170M Token Share
 2026.03.27 14:36
 YT.Shi
Quick overview: what is Grass?
Grass (grass.io) is a network that lets users contribute internet bandwidth and collect rewards. The project’s pitch is that bandwidth becomes a resource that can be routed and used for legitimate network demand, and contributors get compensated.

Season based airdrops are how Grass has been rewarding participation. If you were active in Season 1, you already know the vibe: points, eligibility checks, then a claim.
Season 2 in 2026 is where a lot of people are focusing now, especially with the headline number floating around: 170M tokens allocated for distribution. That does not mean you personally get 170M. It means the pool is big enough that missing basic steps feels extra painful.
Before we get into the how to, one warning that matters. Only trust links from Grass’s official site and official socials. If a random Telegram DM sends you a claim link, it is almost always a wallet drain attempt.
Season 2 basics: what "token share" actually means
Your personal amount depends on the program rules, usually some combination of:
● How long you contributed
● Your uptime and consistency
● Any bonus multipliers or tiers
● Referral or community incentives, if they exist
● Anti sybil filters, which can reduce or remove rewards
So your goal is not to chase a number. Your goal is to make sure you are eligible, clean, and ready the moment the claim goes live.
The most common way people lose eligibility is also the dumbest: they used one wallet for earning and a different wallet for claiming, or they never verified whatever the Season 2 portal required.
Let's fix that. Step by step.
Prep checklist (do this before you touch any claim button)
Keep this boring. Boring is safe.
1. Create a clean wallet for Grass
Use a wallet you control, not an exchange deposit address. Back up your seed phrase offline.
2. Make sure you still have access to the email or login you used
If Grass ties accounts to email, you will need it.
3. Have a little gas ready
The claim transaction will require network fees. Keep extra, not the exact minimum.
4. Update your browser and wallet extension
Outdated extensions cause failed signatures, stuck popups, and panic.
5. Bookmark the real site
Do not rely on search ads. Bookmark it and only use that.
If you are managing multiple accounts, do not start cloning setups yet. Read the BitBrowser section later. Most people mess this part up by rushing.
How to check Grass Season 2 eligibility (the safe way)
When Season 2 eligibility goes live, the flow usually looks like this:
1. Go to the official Grass portal (use your bookmark).
2. Log in with the same method you used during participation.
3. Find something like Season 2, Rewards, Airdrop, or Eligibility.
4. Connect your wallet.

5. Confirm the wallet address matches what you intend to claim with.
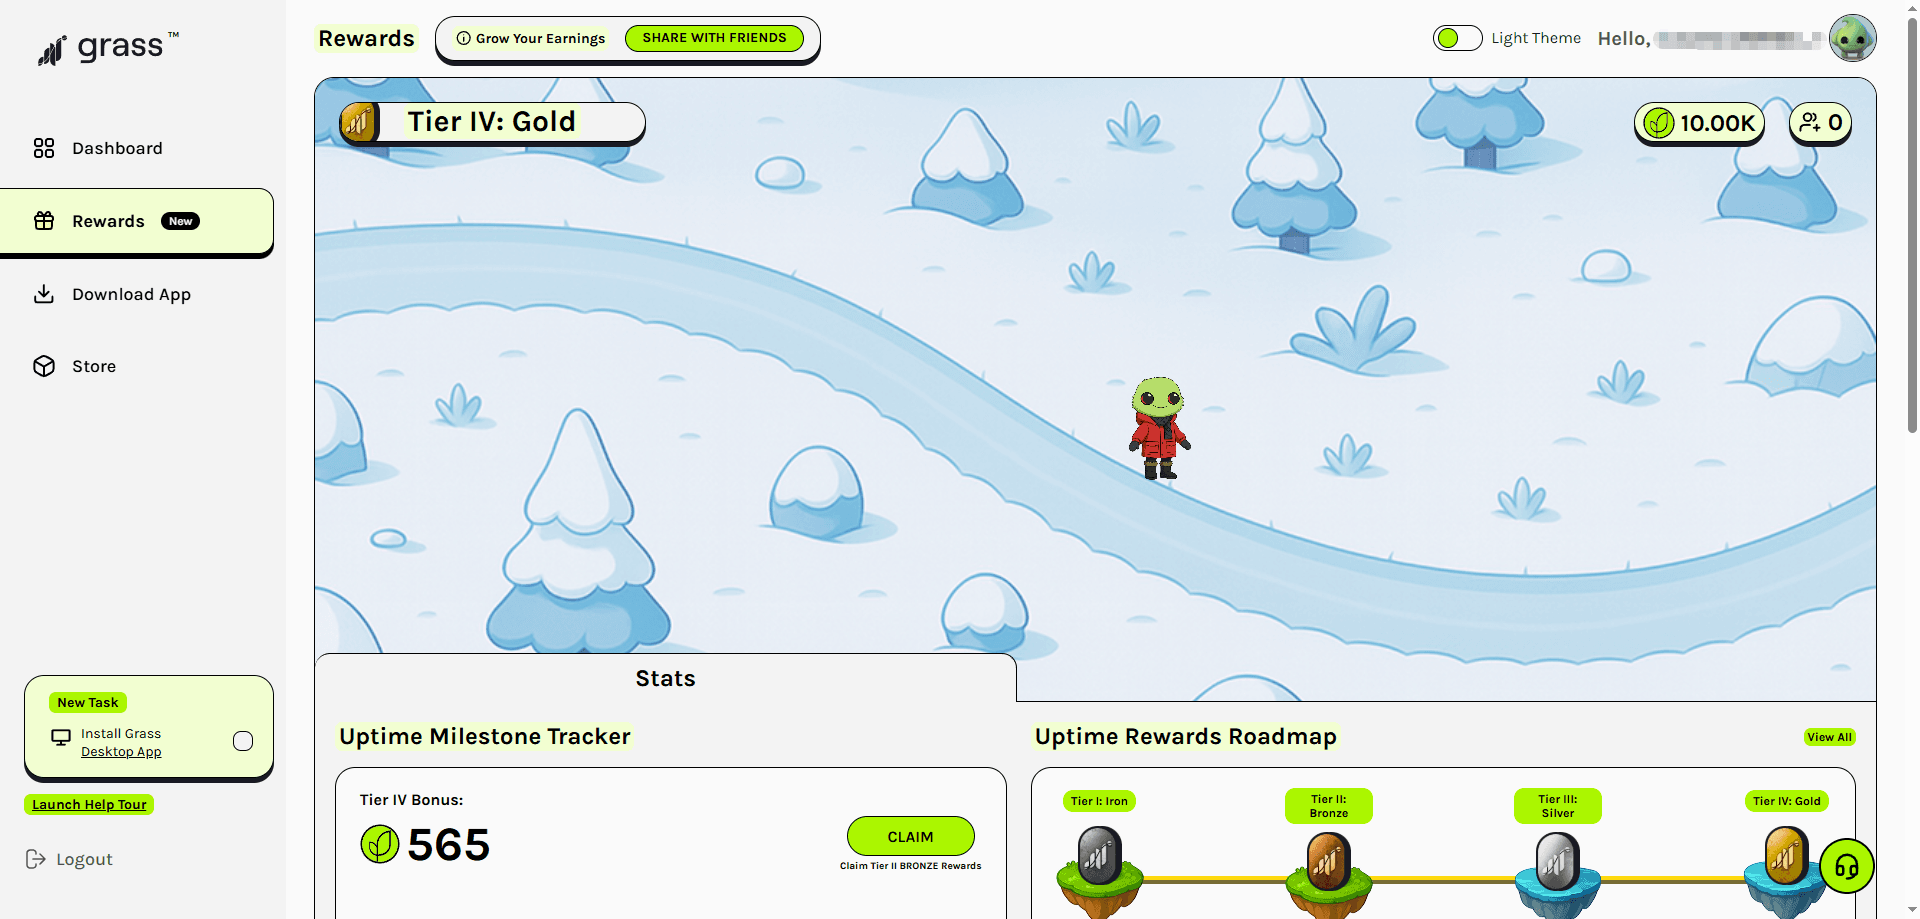
What you are looking for:
● An eligibility status like "Eligible" or "Ineligible"
● A points total or contribution score
● A projected claim amount or a claimable amount
● Any required extra steps, like verifying email or completing a captcha
If it says ineligible, do not spam refresh and do not click random "fix eligibility" links. Screenshot it, check official announcements, and wait for clarification. Sometimes rules update or the portal rolls out in stages.
How to claim Grass Season 2 tokens (step by step)
The actual claim steps are usually simple. The mistakes happen around them.
1. In the official portal, open the Claim page.
2. Click Connect Wallet and choose your wallet provider.

3. Confirm you are on the correct chain if a chain selection appears.
4. Click Claim.
5. Your wallet will open a transaction or signature request. If it is a transaction, check gas and confirm. If it is only a signature, still read what you are signing.
6. Wait for confirmation.
7. Refresh the portal and verify status changes to something like Claimed.
8. Add the token contract to your wallet only if the portal provides the contract address from an official source.
Two quick safety rules
● If the site asks for your seed phrase, it is a scam.
● If the transaction says "SetApprovalForAll" or unlimited approvals to a weird contract when it should be a simple claim, stop.
Also, be aware of Ethereum token approvals as they can sometimes be manipulated by scammers to gain unauthorized access to your assets.
Claim timing, windows, and what I’d do on day one
A lot of claim windows are time based. Some people get impatient and interact with unofficial tools that promise faster claims. That is where drains happen.
What I do when a claim goes live:
● Wait 10 to 20 minutes for official confirmation posts.
● Use the official link from the project, not a repost.
● Claim once, then stop touching it.
● Take screenshots of transaction hash and claimed status.
If the network is congested, do not crank gas blindly. It is often better to wait. Unless the claim window is extremely short, paying a fortune just to be first rarely matters.
Managing multiple Grass accounts with BitBrowser
BitBrowser (https://www.bitbrowser.net) is an antidetect browser that lets you create separate browser profiles with isolated fingerprints. That matters because if you are running multiple accounts in the same normal browser, sites can link them through cookies, fingerprinting, local storage, and IP patterns.
BitBrowser is useful for:
● Keeping a personal account separate from a work or family account
● Managing accounts for different devices you own
● Preventing cross login issues and cookie collisions
The goal is clean separation. Not chaos.
BitBrowser setup: profiles, proxies, and clean separation
Here is a simple, stable setup that avoids the "everything gets linked anyway" problem.
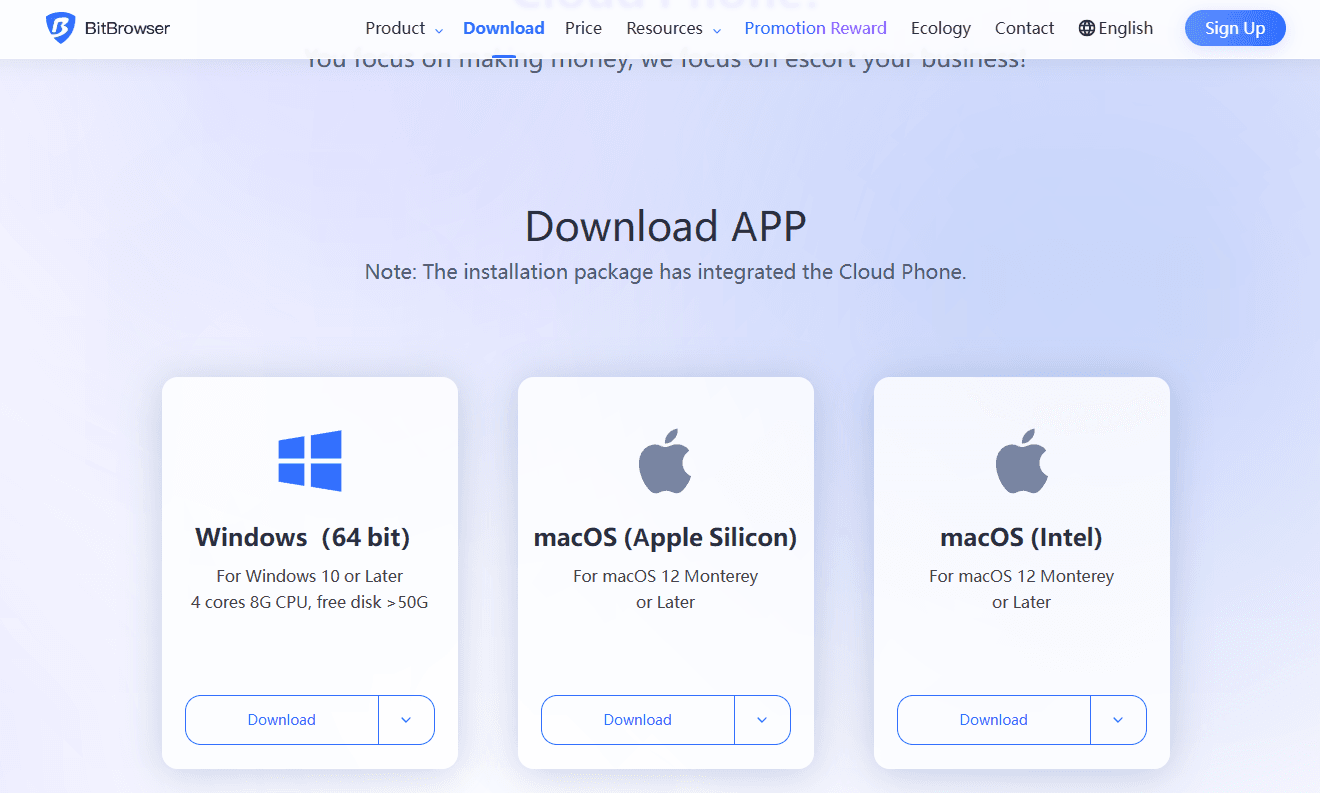
1. Install BitBrowser from the official source.
2. Create a new browser profile for each Grass account.
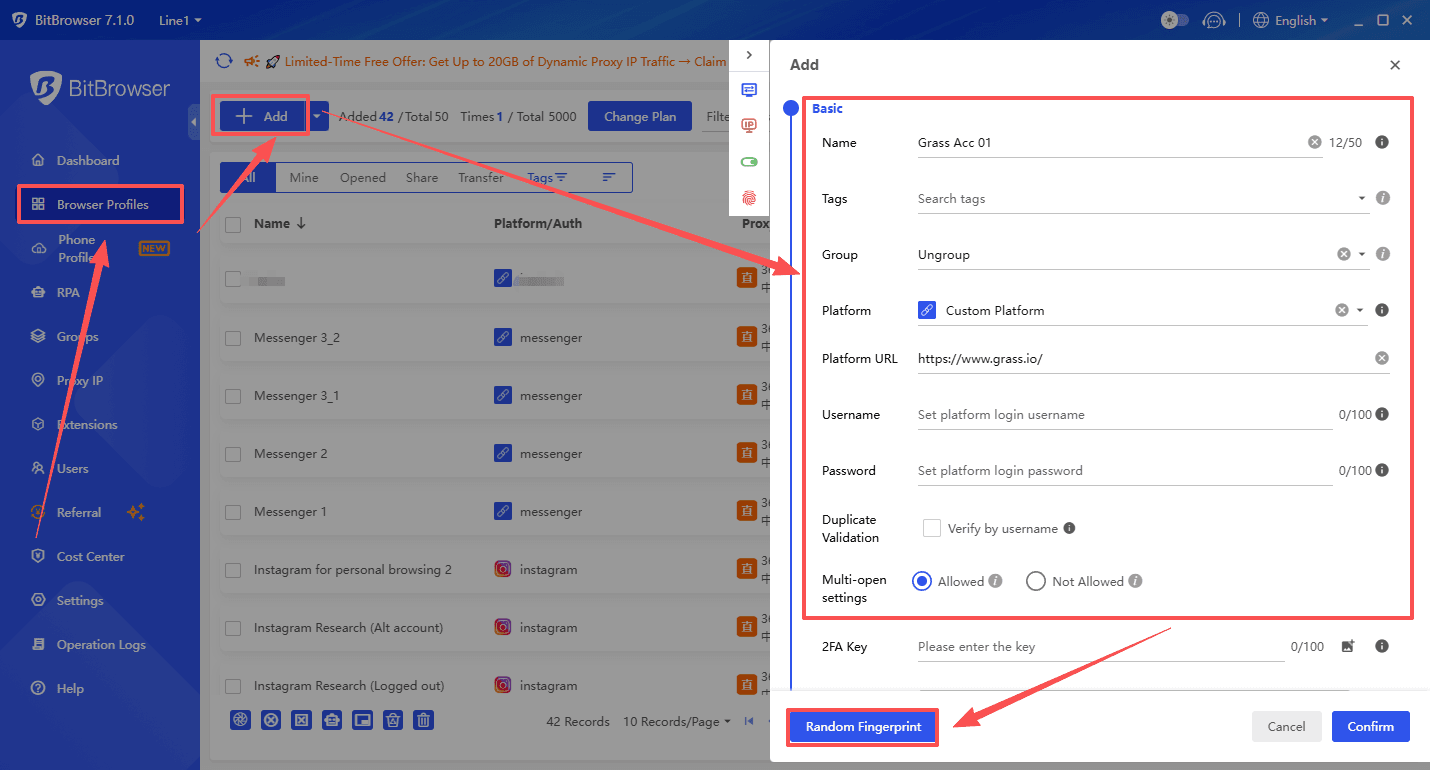
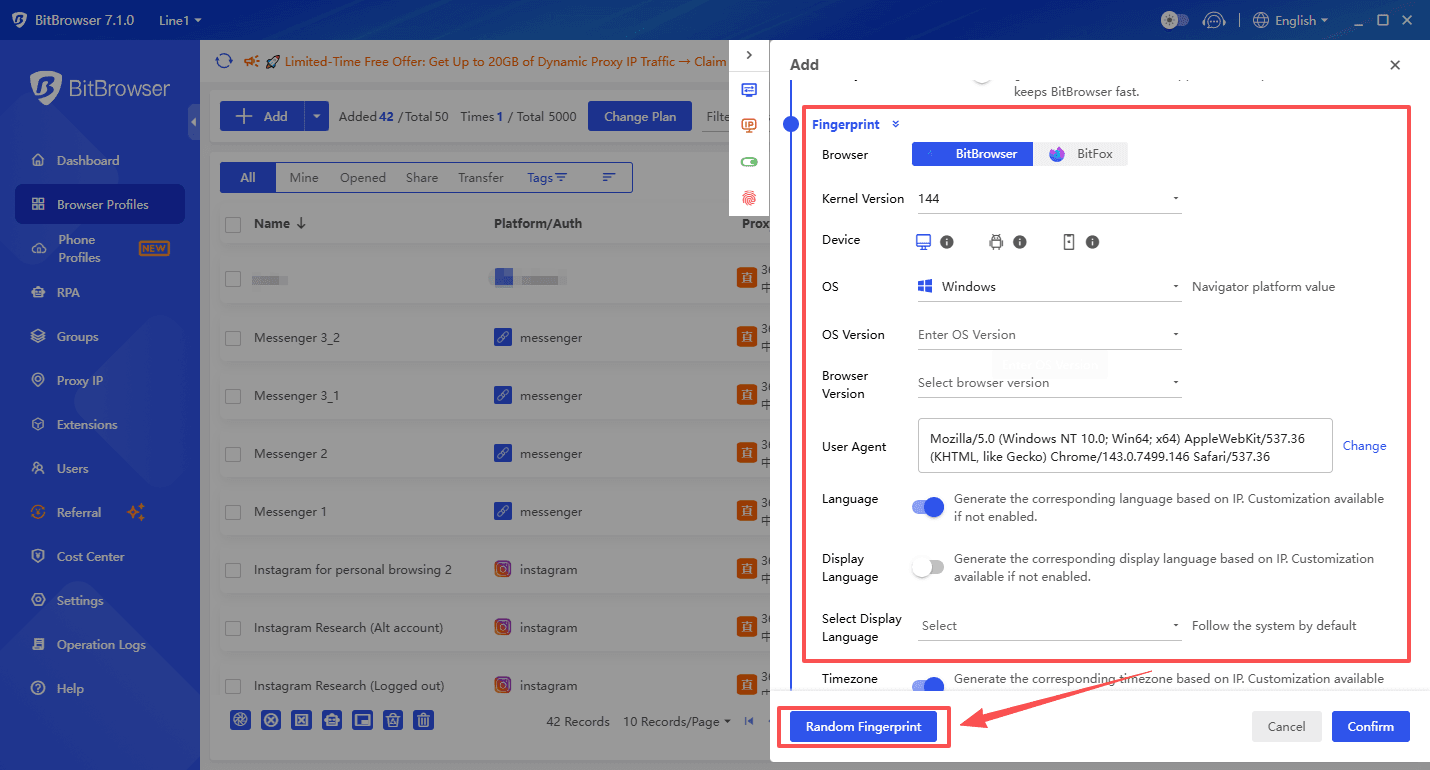
3. For each profile, configure unique user agent and fingerprint settings (BitBrowser can generate these). Separate cookies and storage are enabled by default per profile.
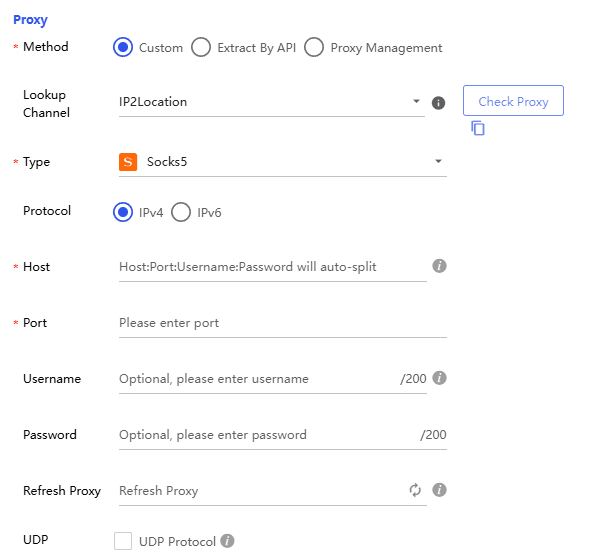
4. Assign a dedicated proxy per profile. Ideally use residential or ISP proxies, not datacenter. Keep country and city consistent over time.
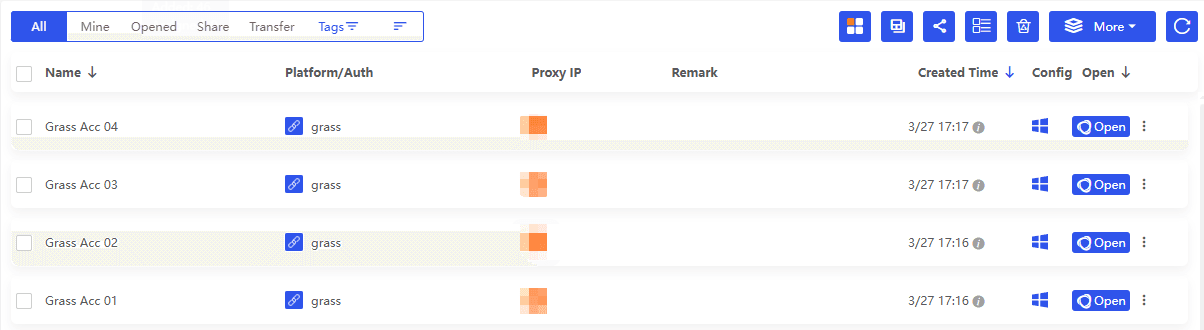
5. Name profiles clearly. Example: Grass Acc 01, Grass Acc 02, and so on.
6. In each profile, install your wallet extension fresh, create or import only the wallet for that specific account, and log into only that Grass account.
The biggest mistake is using one proxy across many profiles. The second biggest mistake is logging into multiple Grass accounts from the same profile "just this once". That one time is often what creates the link.
BitBrowser daily workflow (so you do not trip flags)
If you are actively maintaining accounts, keep your behavior consistent.
General Operating Principles
● Open only the profile you are using right now.
● Do tasks in a human rhythm. Click around normally. Do not speed run 10 accounts in 2 minutes.
● Keep IP consistency. Do not jump countries daily.
● Avoid identical patterns across accounts. Same login time, same actions, same sequence can look automated.
● Store notes per profile: email used, wallet address, login method, last active date.
Claim Day Procedure
When claim day comes, treat it like a checklist:
1. Open Profile 01, claim, record tx hash, logout.
2. Close Profile 01.
3. Open Profile 02, repeat.
It is slower, yes. It is also cleaner.
Common claim problems (and what usually fixes them)
These are the issues I see constantly:
1. Wallet connects but claim button is greyed out
● You might be on the wrong network.
● You might not be eligible yet, or rollout is staged.
● Try a hard refresh, then relog once.
2. Transaction fails
● Not enough gas.
● Network congestion.
● Wallet set to low gas.
● Wait and retry, do not spam.
3. Portal shows claimed but tokens not visible
● Add token contract, but only from official sources.
● Some distributions are vested or delayed.
4. Suspicious signature requests
● Stop. Disconnect. Verify the URL. Check official announcements.
If you are unsure, do not “experiment” with approvals. Airdrop claim contracts rarely need unlimited approvals of other tokens.
Conclusion
most people do not lose airdrops because they missed some advanced strategy. They lose them because they rushed, clicked the wrong link, connected the wrong wallet, or tried to get clever with setups that look automated. Keep your participation clean. Use one bookmarked official portal. Separate accounts properly if you have a legitimate reason to manage more than one.
 Multi-Account Management
 Prevent Account Association
 Multi-Employee Management
Recommended
See More ![]()