How to Create a LinkedIn Company Page for Your Business
 2026.04.27 13:48
 YT.Shi
Here’s a step-by-step guide to creating a LinkedIn Company Page for your business. Before diving into the steps, it's important to understand that you need a personal LinkedIn profile to create and manage a company page. LinkedIn does not have a standalone "business account" login. Your company page will be managed through your existing LinkedIn profile.
Step 1: Prepare Your Profile and Assets
Creating a company page is straightforward, but laying the groundwork beforehand ensures a smoother process.
● Complete Your Personal Profile: Your profile should be active, use your real name, list your current position at the company, and be at least partially filled out (e.g., with a photo, headline, and work history). A more complete profile is recommended to establish credibility as a page admin.
● Use a Company Email: For verification and a more professional appearance, it's best to have your personal email address associated with your company's domain.
Before you log in, gather these essential brand assets:
● Company Logo: A square image, ideally 300x300 pixels.
● Cover Image: A banner image to represent your brand. The recommended size is 1128 x 191 pixels (or alternatively 646 x 220 pixels).
● Company Information: Have your official company name, website URL, industry, company size (e.g., number of employees), and type (e.g., public, private, nonprofit) ready.
● Compelling Description: Prepare a brief "tagline" and a longer "About Us" section that clearly explains your business.
Step 2: Follow the Step-by-Step Creation Process
With the preparation complete, you're ready to create your page. Here’s how to do it.
1. Log into Your Personal LinkedIn Account: Start by logging into the personal profile you'll use to manage the page.
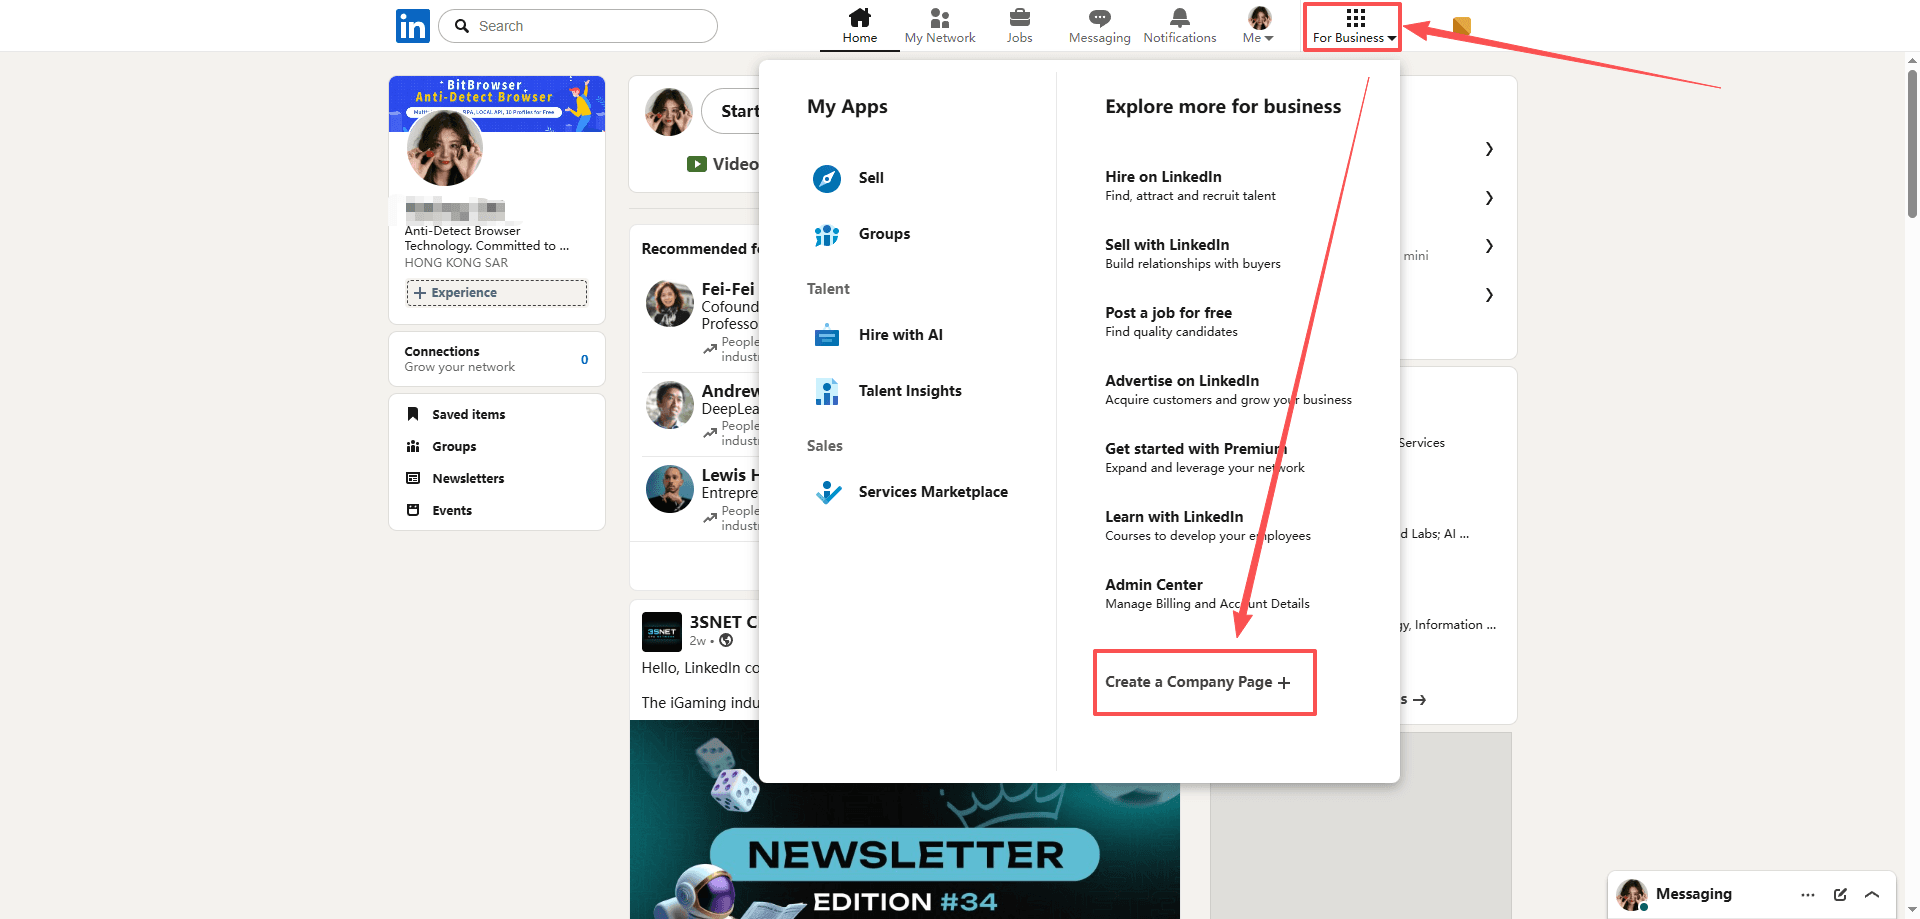
2. Navigate to Page Creation: On your LinkedIn homepage, find the "For Business" icon (it may also be labeled "Work" in some views). It's typically located in the top-right or top-left corner of the navigation bar. Click on it and select "Create a Company Page" from the dropdown menu.
3. Choose Your Page Type: Select the option that best describes your business.
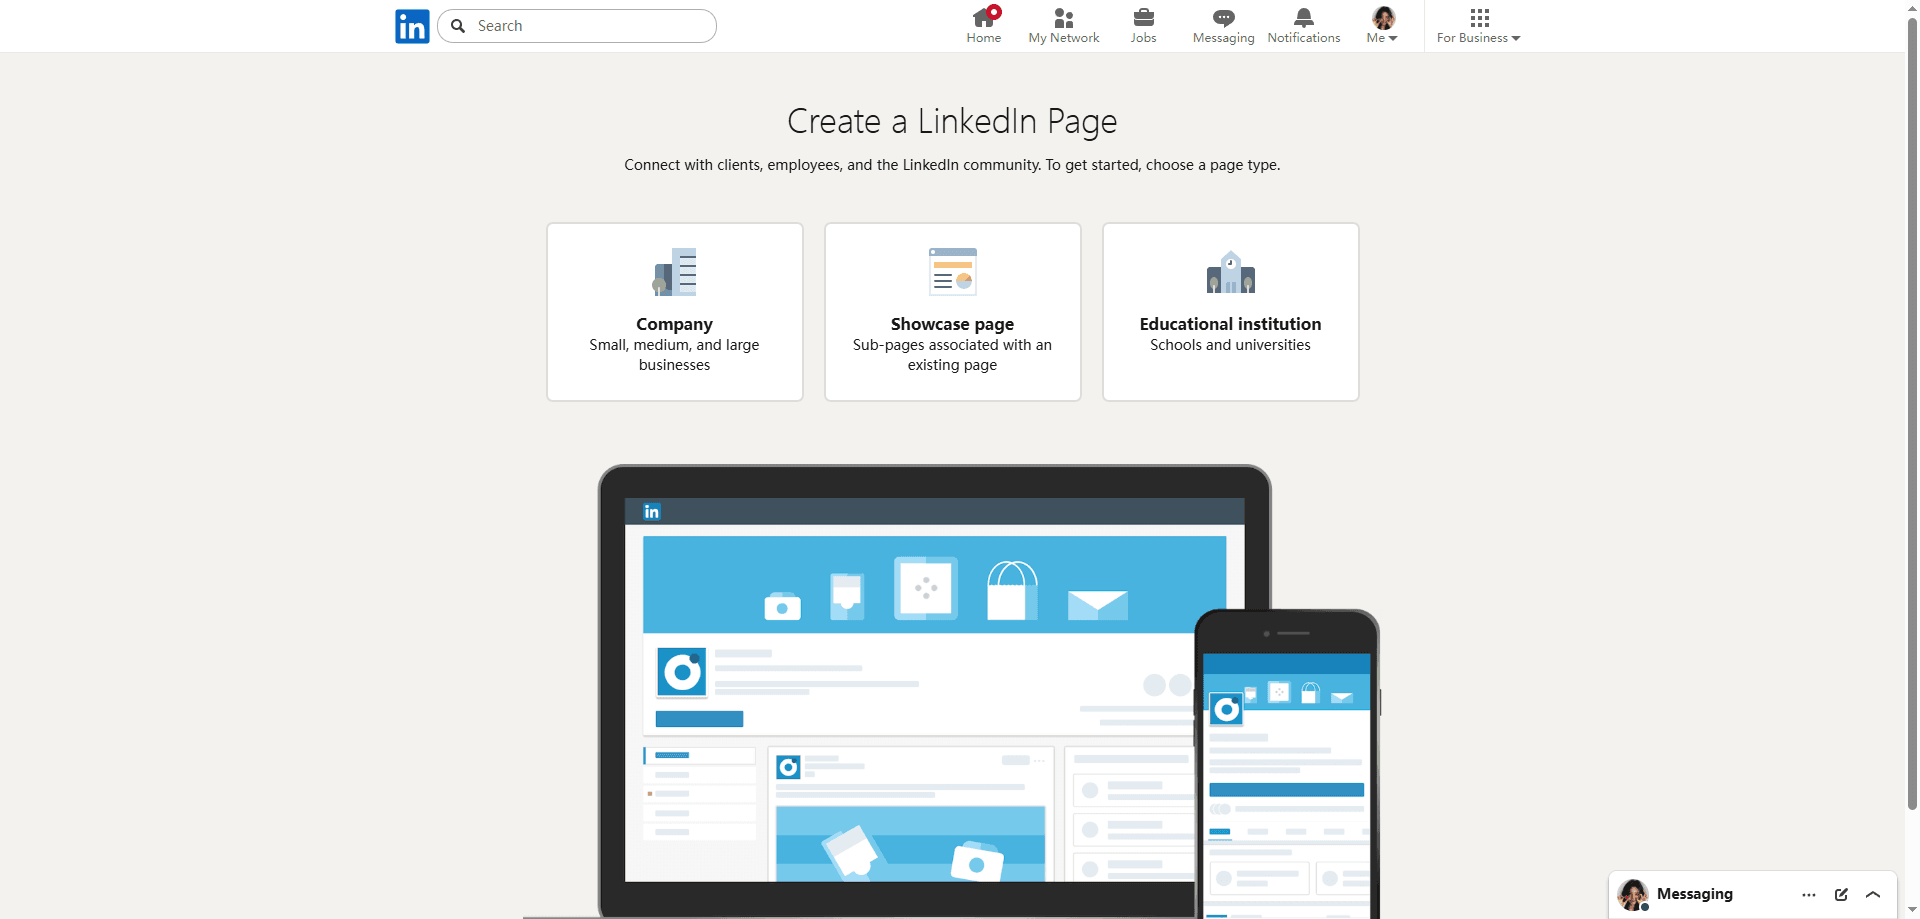
● Company: For most businesses (small, medium, or large).
● Showcase Page: A sub-page of your main company page, ideal for highlighting a specific brand, product line, or initiative.
● Educational Institution: For schools and universities.
Step 3: Fill in Your Company Details Completely
This is where you build the core of your company's presence on LinkedIn.
1. Basic Information: Enter your official company name, a custom public profile URL (e.g., linkedin.com/company/your-business-name), your website, industry, company size, and type.
2. Add Visuals: Upload your prepared company logo and cover image to give your page a professional and branded look.
3. Write Your Description: Craft a strong company description.
● Tagline: Write a short, snappy one-liner that appears next to your logo.
● About Us: Write 2-3 paragraphs explaining what your company does, who you serve, and what makes you unique. You have up to 2,000 characters. The first 156 characters are especially crucial as they appear in Google search previews.
4. Add a CTA Button: Choose a call-to-action button for your page from options like "Visit website," "Contact us," "Learn more," or "Sign up".
5. Verify and Launch: Check the box confirming you have the authority to create the page on behalf of the organization, then click "Create Page".
Step 4: Optimize Your Page for Success
A complete page is a successful page. LinkedIn itself notes that companies with fully completed profiles receive 30% more weekly views.
● List Your Specialties: Add up to 20 keywords or tags in your page's specialties section to help people find your business through search.
● Link Your Profile: In your personal profile's "Experience" section, ensure your current role is linked to the new company page. This displays your company's logo next to your name, lending immediate credibility to both.
● Add Page Admins: As the Super Admin, you can assign other people to help manage the page. Go to your page's "Admin tools" to invite others with different access roles (e.g., Admin, Analyst).
How to Maximize Your New Company Page
Consider these additional strategies to maximize your new company page.
● Leverage Employee Networks: Ask your employees to add your company page to their profiles. This simple act can significantly expand your page's organic reach, far more effectively than any single promotional effort.
● Understand the Role of Personal vs. Company Pages: Your personal profile is for building individual relationships and trust, while your company page is for establishing your brand's official presence. They are most powerful when used together. Note that LinkedIn ads can only be run from a company page, not a personal profile.
● Explore Premium Tools for Growth: If your goal is direct B2B sales, consider LinkedIn Sales Navigator. This premium tool offers advanced filters and search capabilities to find and connect with ideal prospects. It is an add-on to your personal account, with plans starting around $119.99/month (with a free trial available).
● Leverage Showcase Pages: Once your main company page is established, consider creating Showcase Pages for different products, services, or target audiences. These are sub-pages that allow for more tailored content and help you segment your marketing efforts effectively.
Why Combine a LinkedIn Business Page with BitBrowser
Creating a LinkedIn Company Page is the first step toward establishing your brand’s official presence. But for B2B lead generation, recruitment, or regional marketing, many businesses eventually need to manage multiple LinkedIn accounts (e.g., several sales or recruiting profiles, or pages for different brands).
This is where an antidetect browser like BitBrowser becomes essential – it lets you run many accounts on one computer without triggering LinkedIn’s security flags. When you need to:
● Manage multiple LinkedIn personal profiles (e.g., sales reps, recruiters) that also administer your Company Page,
● Run separate LinkedIn accounts for different target countries or brands,
● Reduce the risk of account association and bans,
BitBrowser provides a secure infrastructure – “one account, one browser fingerprint, one clean IP.”
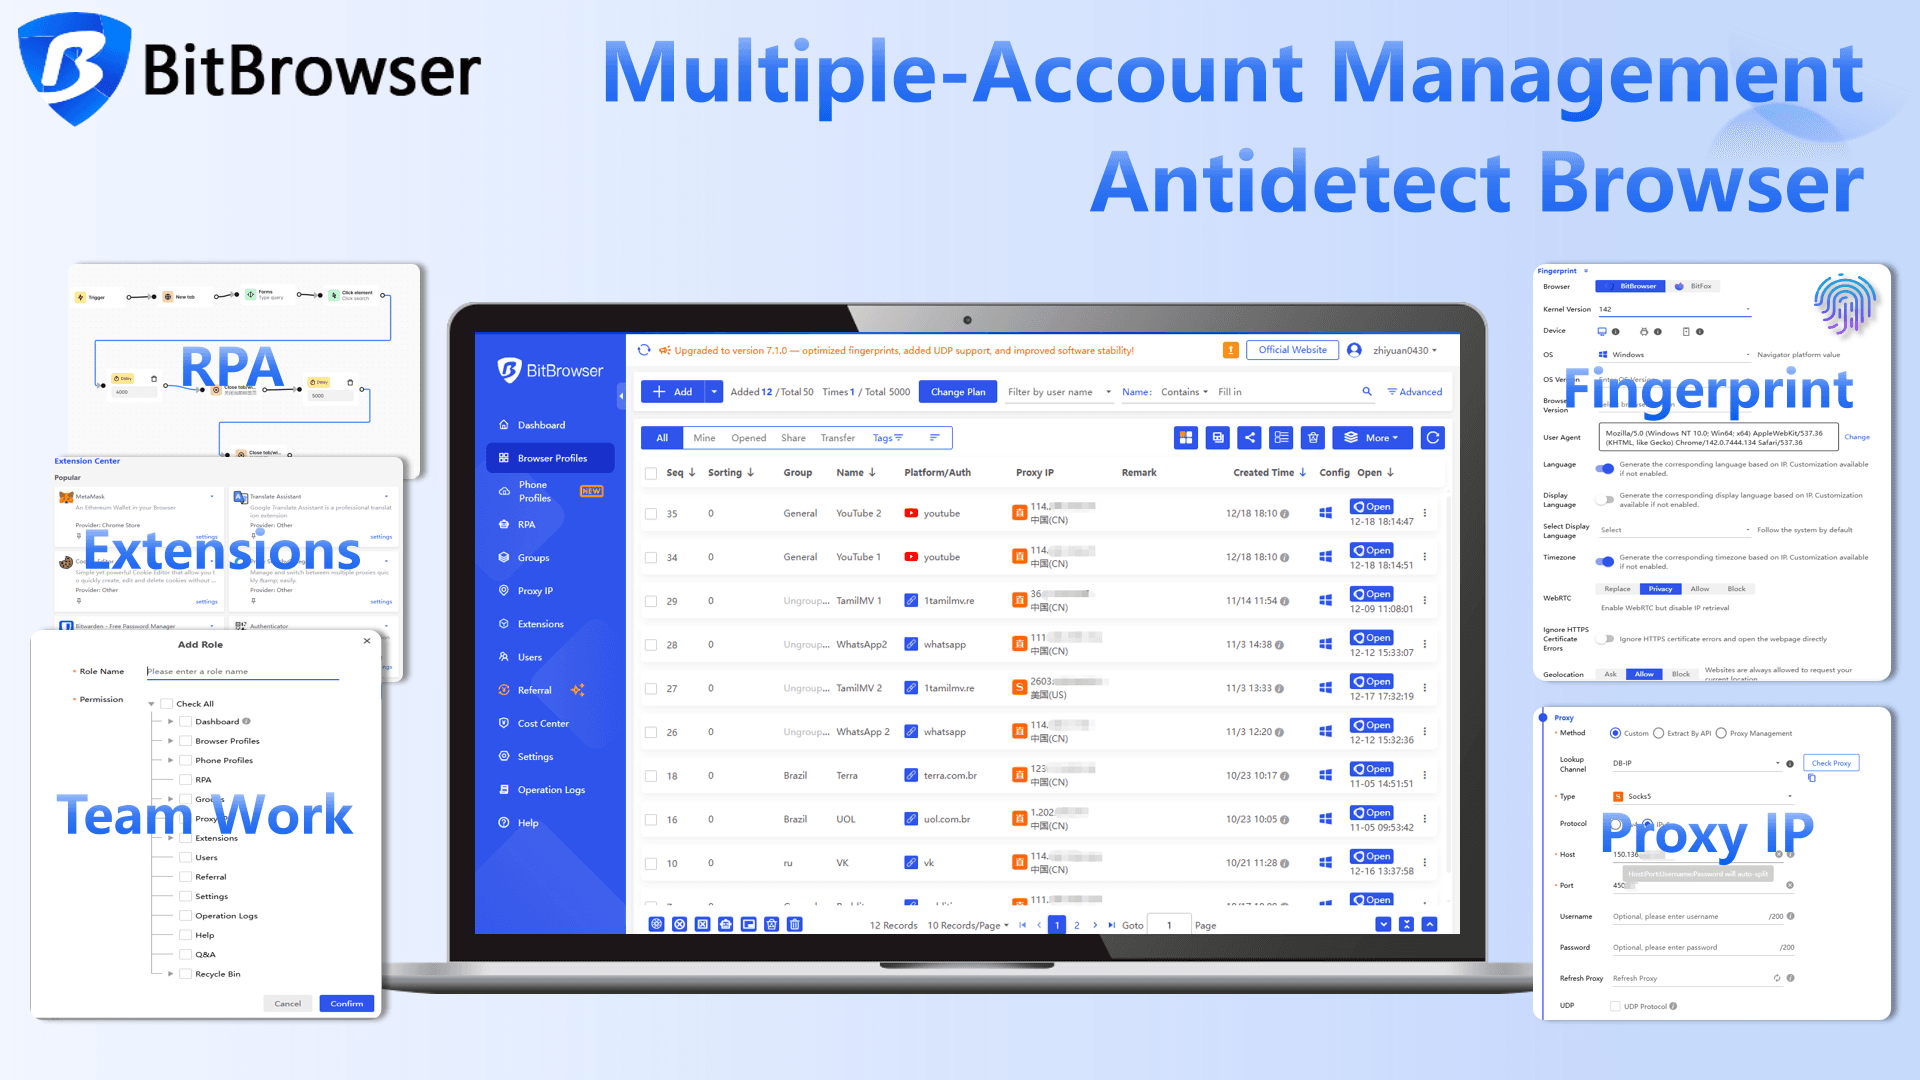
Setting Up BitBrowser for LinkedIn Multi‑Account Management
You will need:
● A BitBrowser account (10 free environments for new users)
● A static residential proxy per LinkedIn account (ensures stable, real‑looking IPs)
● Valid LinkedIn personal account credentials
Step‑by‑step configuration:
1. Create a new browser environment in BitBrowser – name it (e.g., “LinkedIn – Sales USA”).
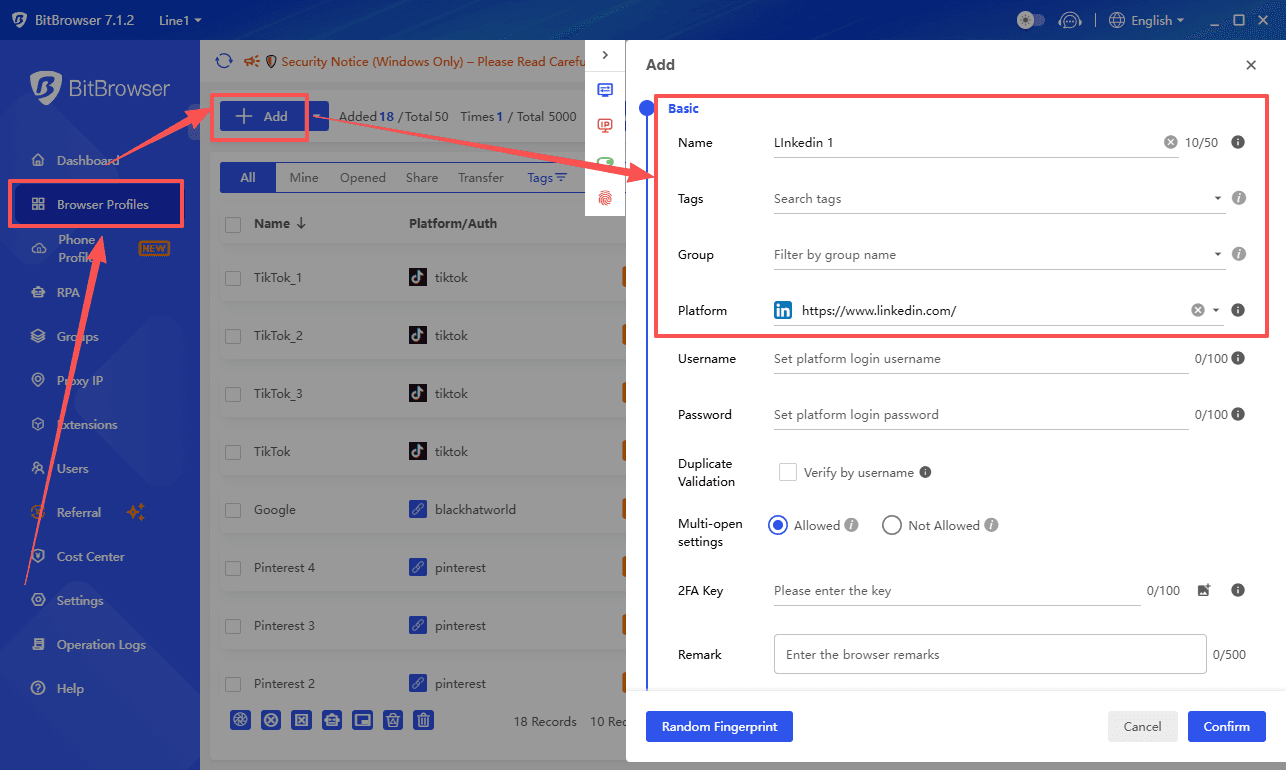
2. Configure the proxy – enter the IP address, port, and proxy type (HTTP/SOCKS5). Test the connection.
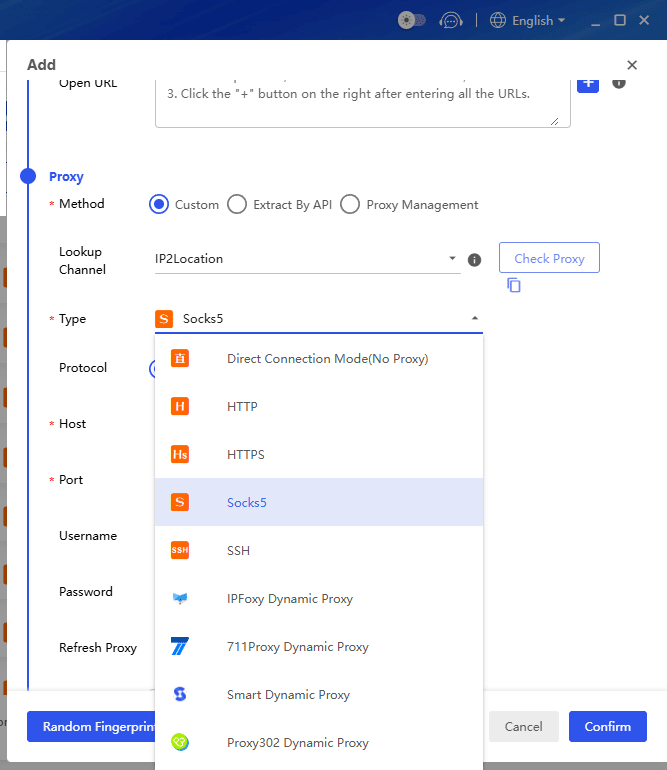
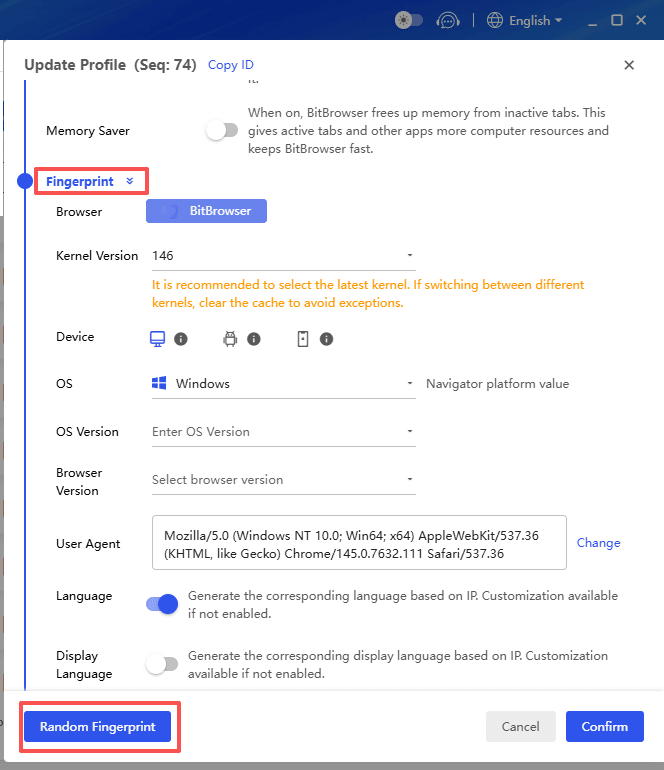
3. Adjust fingerprints (optional) – match the operating system and timezone to the proxy’s geolocation.
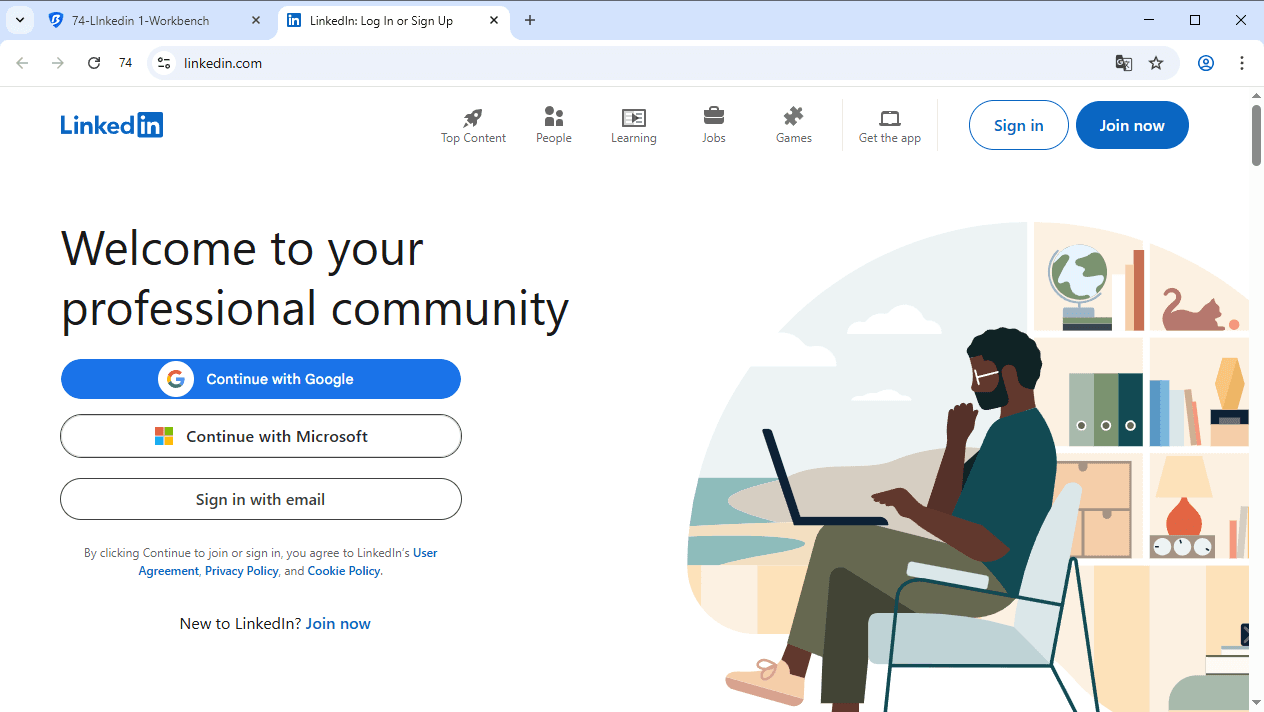
4. Open the environment – it launches a separate, isolated browser window. Log into your LinkedIn account.
5. Repeat for every additional LinkedIn account you want to manage.
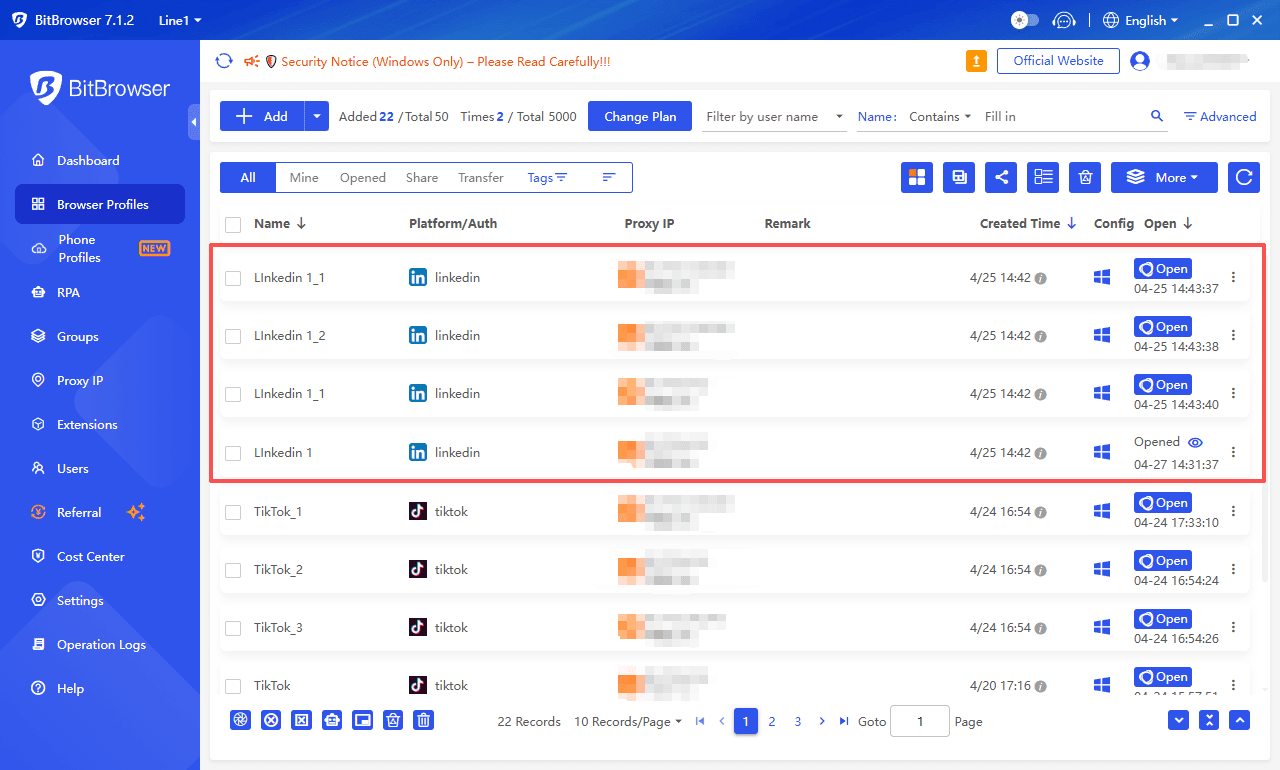
Each environment acts like a completely different physical device, so LinkedIn cannot link them together.
Sign Up
Security & LinkedIn’s Rules
LinkedIn strictly prohibits one person creating multiple personal accounts. However, a team of real individuals can each have their own account. BitBrowser is a tool for secure, separate access – not for creating fake identities.
Risk awareness:
Automation (e.g., bulk connection requests, mass messaging) violates LinkedIn’s User Agreement and can lead to permanent bans. If you use BitBrowser’s RPA or API features, follow these safety rules:
● Stay below 80 connection requests per day per account.
● Randomize waiting times between actions (45–90 seconds).
● Rotate 5–7 different message templates.
● Prefer browser extensions over cloud‑based automation scripts.
Final Takeaway
Start by creating a fully optimized LinkedIn Company Page – it’s your brand’s official hub. Then, if you need multiple employees to proactively network or manage different regional pages, onboard BitBrowser to provide each account with its own clean environment. This combination gives you the authority of a verified business presence and the operational scale of a multi‑account system – all while minimizing security risks.
Pro tip: Begin with the 10 free BitBrowser environments for two or three accounts. Prove the workflow’s safety before expanding to a full team.
If you'd like to grow your account, you can find out how to safely get more LinkedIn profiles.
 Multi-Account Management
 Prevent Account Association
 Multi-Employee Management
Recommended
See More ![]()