How to Set Up FleetProxy.io Proxies in BitBrowser
 2026.08.20 13:09
 emilos
BitBrowser is a popular antidetect browser for anyone running multiple accounts on the same machine without letting the accounts get linked. Each profile keeps its own fingerprint, cookies, and proxy, so a Facebook Ads account in one profile never touches an Amazon store in another. Point each profile at a FleetProxy.io IP and the two accounts leave completely separate footprints. The proxy fields sit inside the Add Profile dialog, and the setup takes about five minutes per profile.
BitBrowser, an antidetect browser built for multi-account operations.
What You Need
● An active FleetProxy.io plan (residential rotating, static residential, mobile rotating, or datacenter)
● BitBrowser installed on Windows or macOS
● Your proxy credentials from the FleetProxy.io dashboard
Not sure which proxy type fits? Rotating residential works for most multi-account setups, while static ISP IPs suit accounts you plan to keep long term.
Get Your FleetProxy.io Credentials
Every BitBrowser profile needs a host, port, username, and password. Here is where to find them in the dashboard.
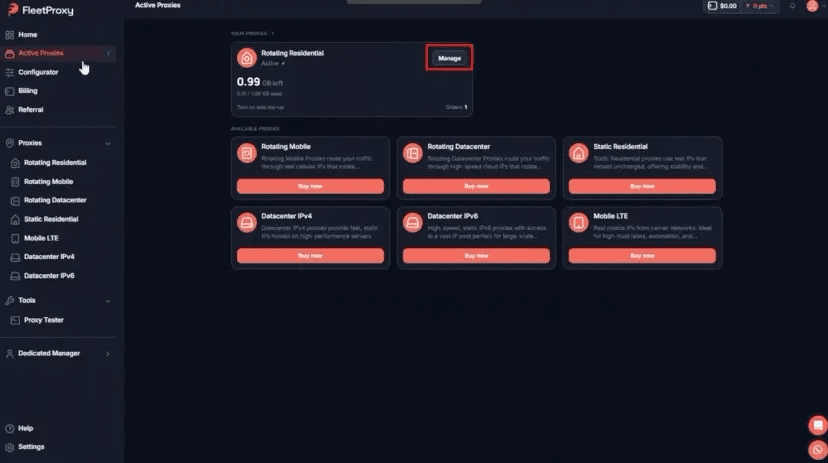
1. Open Active Proxies
Log in to the FleetProxy.io dashboard and click Active Proxies in the left sidebar. It lists every plan you already own.
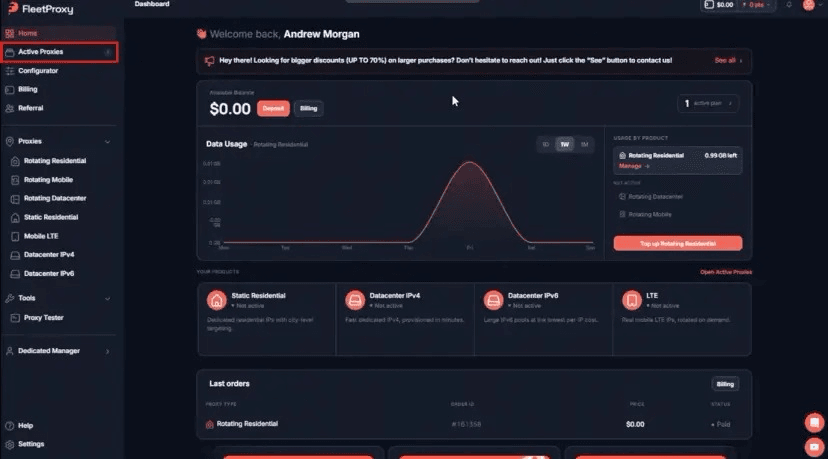
2. Manage the plan you want to use
Find the product you are connecting, then click Manage. Each product has its own host and ports, so pick the one you actually plan to route traffic through.
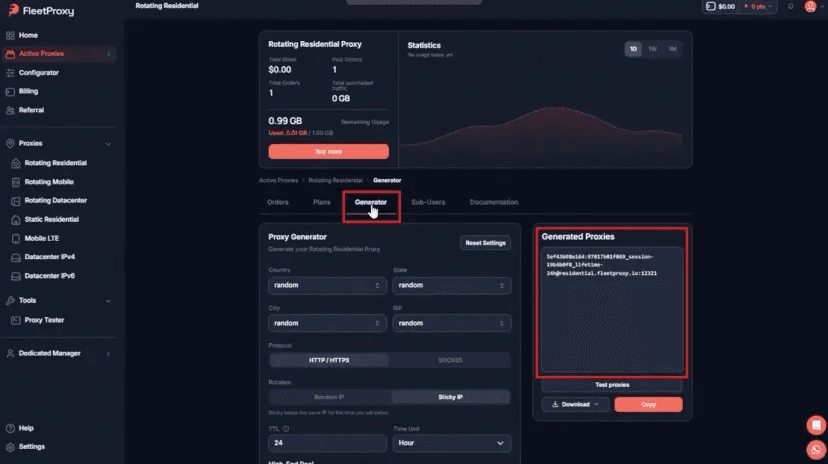
3. Generate and copy your proxy
Open the Generator tab. Choose country, state, city, or ISP if you need a specific location, pick HTTP/HTTPS or SOCKS5, then set rotation to Random IP or Sticky IP. Your credentials appear on the right, ready to copy.
Host and port for every product
BitBrowser Proxy Setup, Step by Step
1. Create a new profile
Open BitBrowser and click Browser Profiles in the left sidebar. This is where every profile lives.
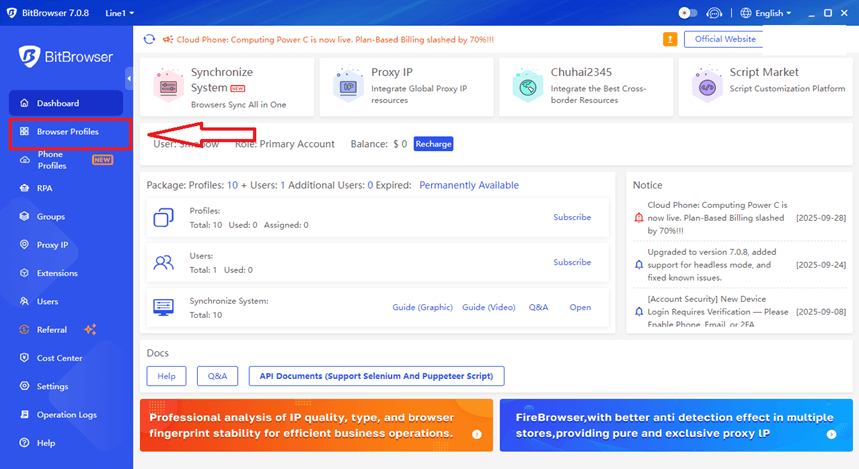
BitBrowser dashboard with Browser Profiles in the left sidebar.
At the top of the profiles list, click the blue Add button. The Add Profile dialog opens. Give the profile a name that tells you which account it runs at a glance, something like "TikTok - US - Store 3" rather than "Profile 47".
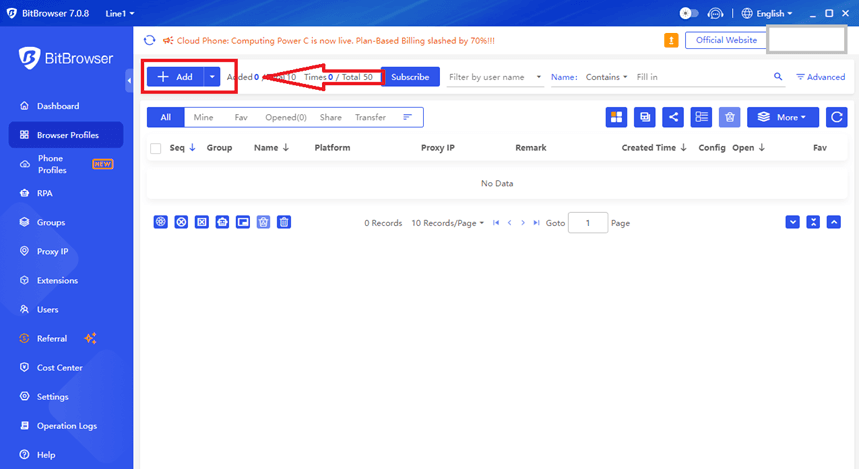
Browser Profiles list with the Add button.
2. Set the basics
In the Basic section, pick a Platform (the site the account lives on), set Multi-open Settings to Allowed so you can launch several profiles at once, and skip the Username / Password / 2FA fields unless you want BitBrowser to store the account credentials for you. Scroll down to reach the Proxy section.
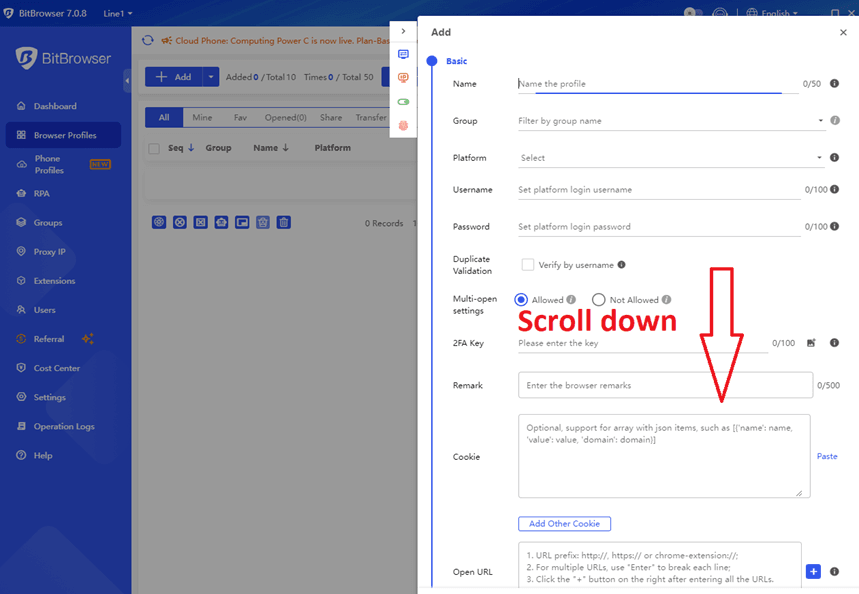
Add Profile dialog, Basic section. Scroll down for Proxy.
3. Fill in the proxy fields and run Check Proxy
In the Proxy section, set Method to Custom, leave Lookup Channel on DB-IP, then pick your protocol under Type: Http or Https for FleetProxy.io on port 12321, Socks5 for port 32325. Set Protocol to IPv4. Put your gateway into Host (residential.fleetproxy.io for residential rotating), your port into Port, then your credentials into Username and Password.
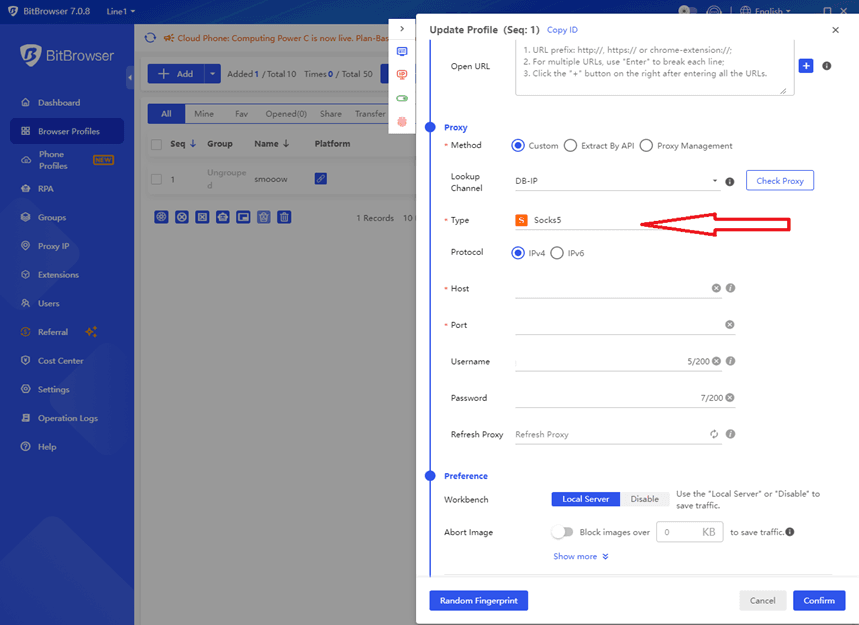
Proxy fields inside the BitBrowser Add Profile dialog.
Click Check Proxy. A passing test returns the exit IP with its country, region, city, timezone, and ZIP, which is your confirmation the connection works.
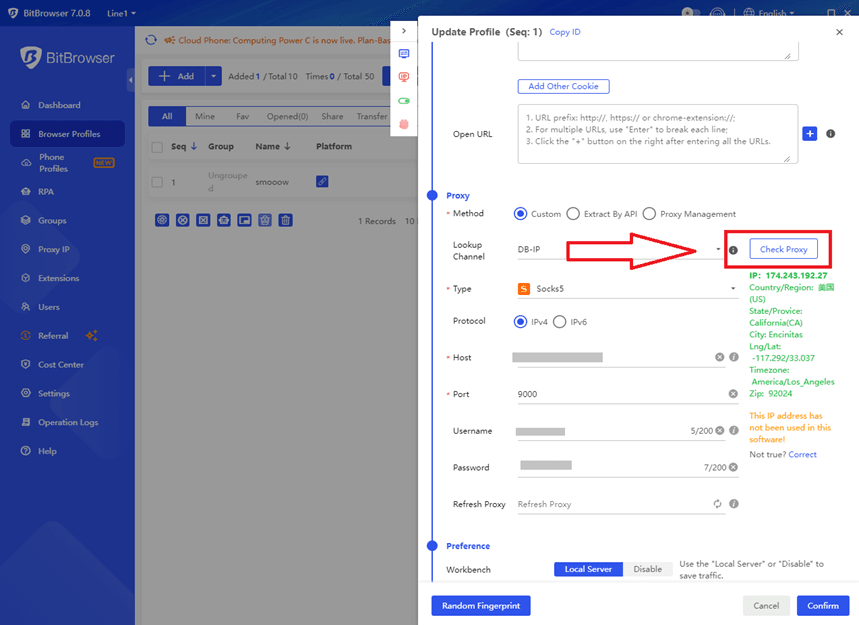
Check Proxy result showing the live exit IP and location.
4. Confirm to save, then open the profile
Click the blue Confirm button at the bottom right. The profile appears in your Browser Profiles list. Click Open and BitBrowser launches a fresh browser routed through your FleetProxy.io IP. Before you use the profile heavily, set the timezone and language to match the proxy location. A US exit IP with a Paris timezone reads as suspicious to almost every platform.
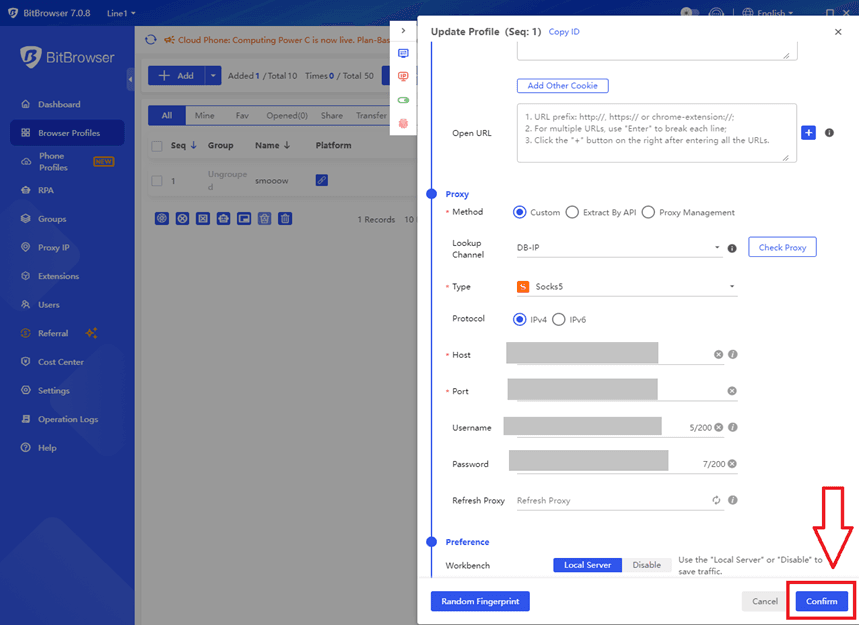
Confirm button at the bottom right of the dialog.
Verify It Actually Works
The Check Proxy result already tells you the exit IP and its location. For a second opinion, open httpbin.org/ip inside the launched profile. The address it reports should be your FleetProxy.io IP, not your own.
You can also run the address through our IP lookup tool to confirm the country and provider, or use the proxy tester to check the connection responds before you start working in the profile.
Troubleshooting BitBrowser Proxy Errors
Check Proxy returns an error
Copy the credentials again straight from the dashboard, since invisible spaces at the start or end of a field are the usual culprit. Then confirm the Type matches the port: 12321 goes with Http or Https, 32325 goes with Socks5.
The IP shows the wrong country
Open the Generator in your FleetProxy.io dashboard, pick the country you actually want, then regenerate the credentials and paste them back into the profile. Rotating residential can drift countries between sessions if you leave targeting blank, so lock it down at the generator level.
Accounts get flagged after setup
Give every account its own IP, never a shared one. Match the profile timezone, language, and location to the proxy geography. Static residential or mobile IPs hold up better here because the identity stays consistent across sessions.
Cannot open several profiles at once
First, check that Multi-open Settings is set to Allowed on every profile you want to run in parallel. Then check the profile limit on your BitBrowser plan, and confirm you have bandwidth left in FleetProxy.io
, because every open profile uses it while browsing.
Still getting blocked once everything connects? That is usually an IP reputation problem rather than a setup problem, and our guide on avoiding IP bans covers what to change.
BitBrowser Proxy Setup FAQ
How do I set up a proxy in BitBrowser?
Create a profile from the Browser Profiles page, scroll down to the Proxy section of the Add Profile dialog, set Method to Custom, choose Http, Https, or Socks5 under Type, then enter the host, port, username, and password from your FleetProxy.io dashboard. Click Check Proxy to confirm it connects, then click Confirm to save.
Does BitBrowser support SOCKS5?
Yes. Pick Socks5 under Type in the Proxy section and use the SOCKS5 port for your product, which is 32325 on residential rotating and 50101 on static ISP.
Which proxies keep BitBrowser accounts safest?
Clean residential or static ISP addresses are the safer bet. The important part is one dedicated IP per account plus a fingerprint that matches its location. Datacenter IPs work for scraping and general research but get flagged fast on strict platforms like Facebook, Instagram, and TikTok.
Can I use one FleetProxy.io account for many BitBrowser profiles?
Yes. One FleetProxy.io plan generates as many sub-credentials as you need, so each profile can pull its own sticky or rotating IP from the same subscription. The billing meter watches bandwidth, not profile count.
What is the difference between Http and Socks5 in BitBrowser?
Http and Https handle web traffic only and work on port 12321 for FleetProxy.io residential. Socks5 handles any TCP traffic and runs on port 32325. For a browser profile either one works fine, so pick based on what the platform prefers.

 Multi-Account Management
 Prevent Account Association
 Multi-Employee Management
Recommended
See More