Announcing BitCloudPhone iOS: Your iOS Cloud Phone Is Now Ready
 2026.07.11 04:20
 BitBrowser
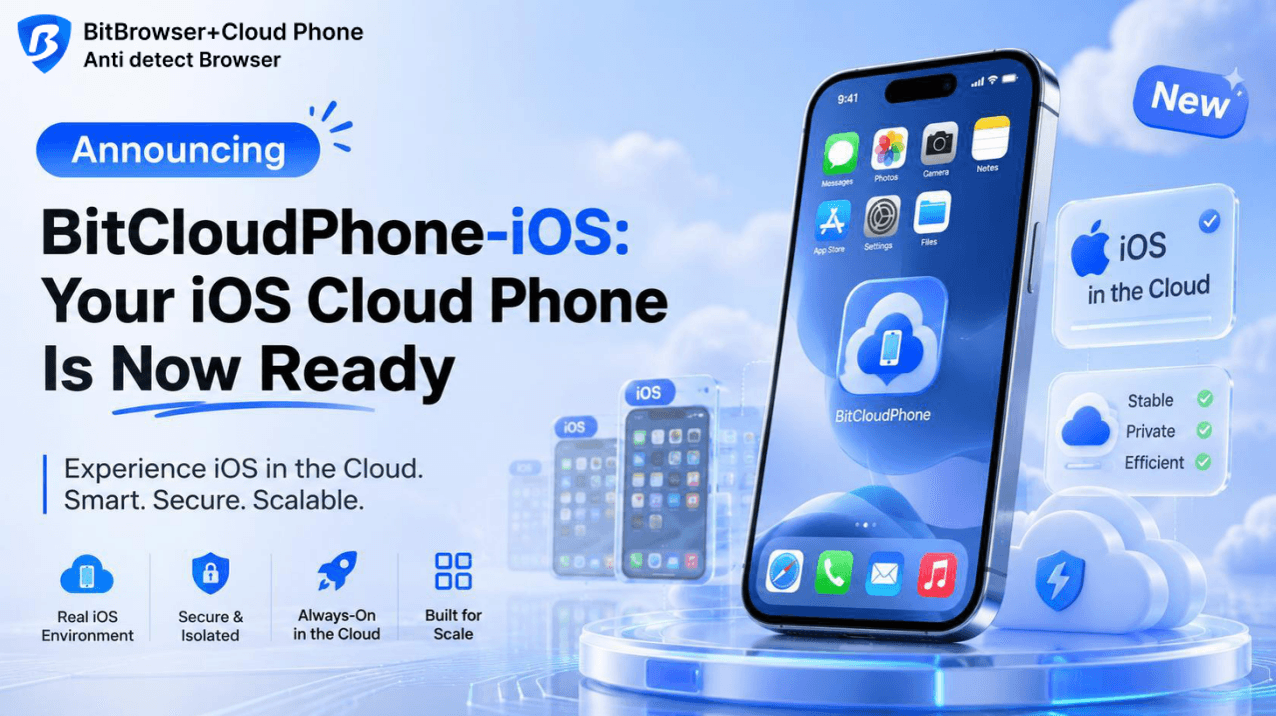
We are thrilled to announce the official launch of BitCloudPhone-iOS. This is a powerful cloud-based service built on virtualization and real-device cluster technology, allowing users to run a genuine iOS environment on other devices.
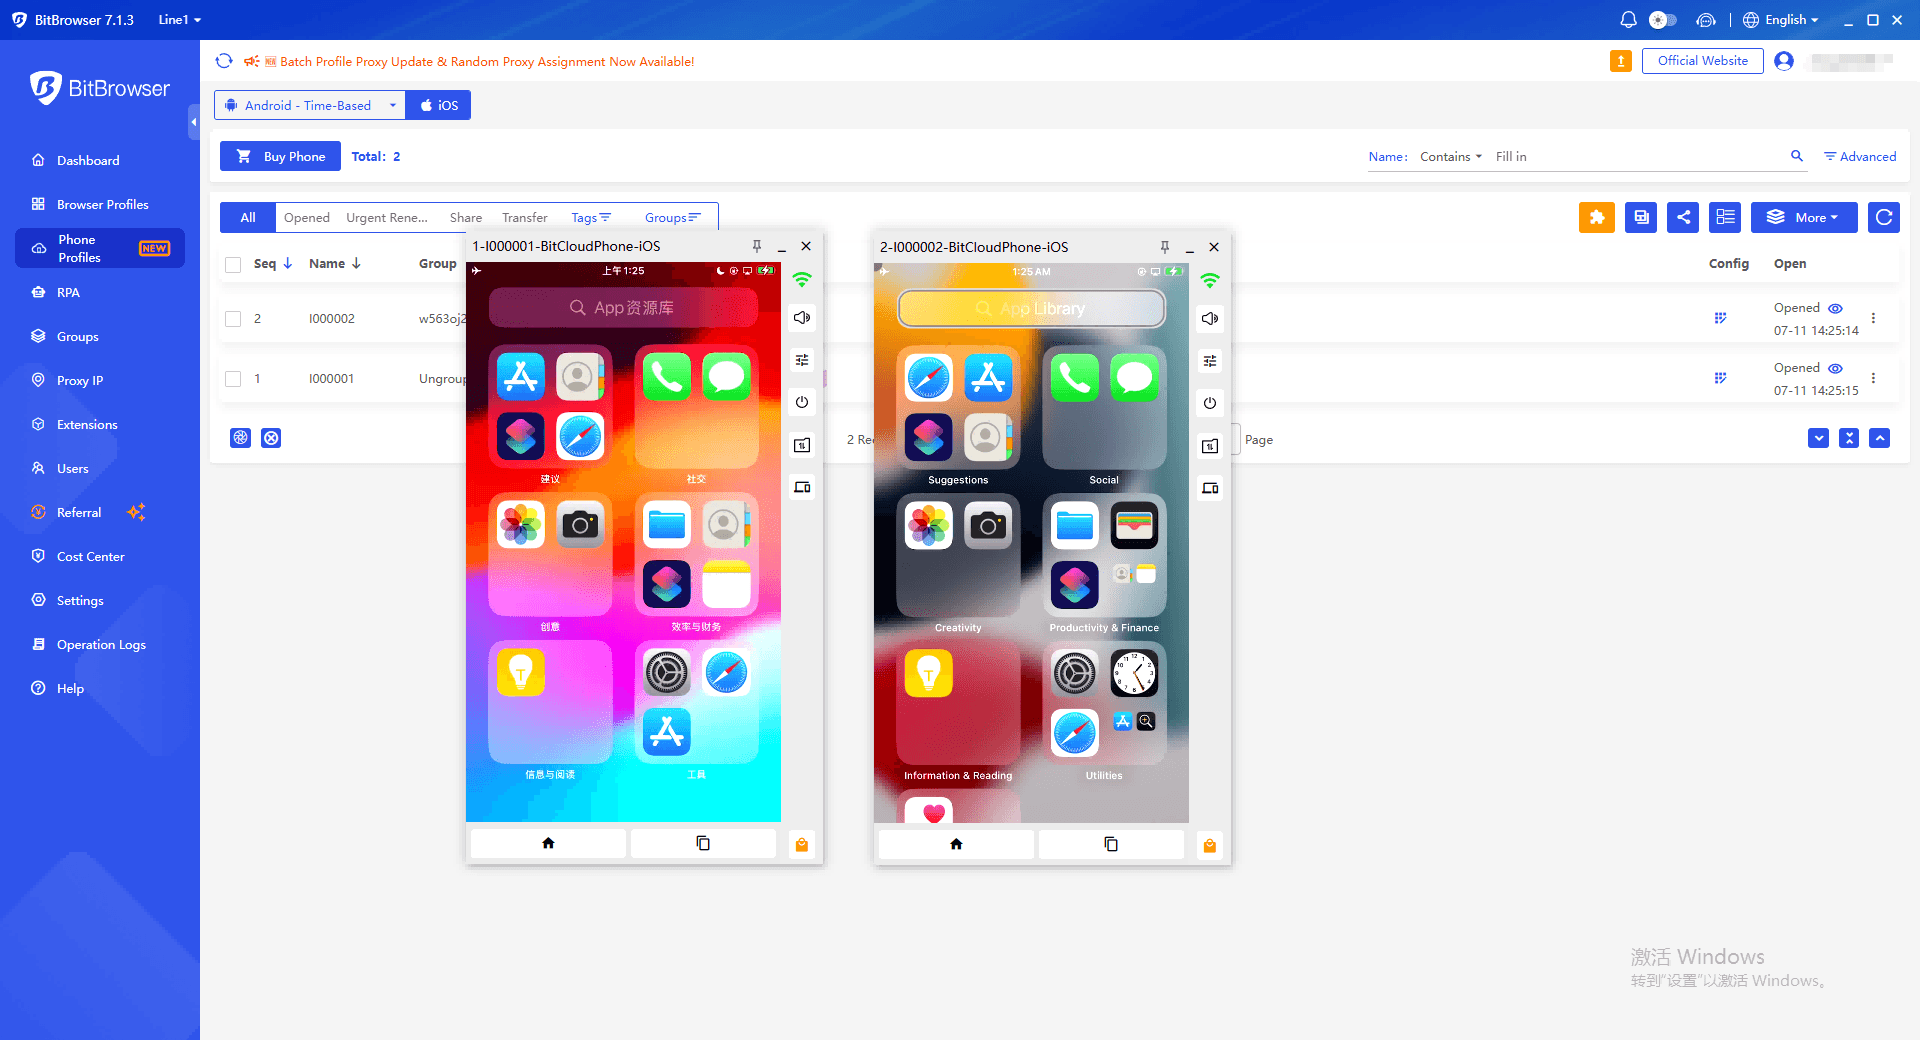
Once you open the BitBrowser Client, you will find a new entry for "iOS" under the "Phone Profiles" section on the left menu. After purchase, the device appears directly in your environment list, and all management—including proxy configuration, app installation, and daily operations—can be completed directly from your computer.
Each cloud phone instance comes equipped with its own A-series chip, authentic device identifiers, and complete sensor functionality, delivering an experience that is nearly indistinguishable from a real iPhone.
🚀 Common Use Cases for BitCloudPhone-iOS
BitCloudPhone-iOS provides instant access to a real iOS environment without the cost and maintenance of physical devices.
· Social Media Management: Manage TikTok, Instagram, Facebook, X, and other accounts from separate cloud devices. Each cloud phone operates independently, helping keep account environments isolated and organized.
· Mobile App Testing: Test apps, login flows, notifications, and user experiences on a genuine iOS environment.
· Affiliate Marketing & Advertising: Run campaigns, verify landing pages, and access mobile-only tools from dedicated iOS devices.
· E-commerce Operations: Manage seller accounts, customer communication, and store applications for platforms like TikTok Shop and Shopify.
· Backup or Temporary iPhone Access: Launch an iOS device instantly whenever you need one, without purchasing additional hardware.
Crucial Prerequisites & Precautions
Before you make a purchase or start the device, please read these critical rules:
1. Proxy is Required: BitCloudPhone-iOS works with SOCKS5 proxies. Simply prepare your proxy and configure it when creating your cloud phone.
2. Proxy First, Boot Later: Proxy configuration must be completed before you turn on the cloud phone for the very first time. Failure to do so may result in startup issues.
3. Device Integrity: Once the device is running, please do not change the Apple ID, format the device, modify the device name, or arbitrarily alter system parameters in "Settings".
4. Auto-Renewal: The auto-renewal feature is enabled by default on the purchase page. Please double-check your order details and decide whether to keep it based on your usage plan.
📱 How to Buy a Cloud Phone
Getting started with BitCloudPhone-iOS is quick and straightforward. Follow these steps to purchase your first instance:
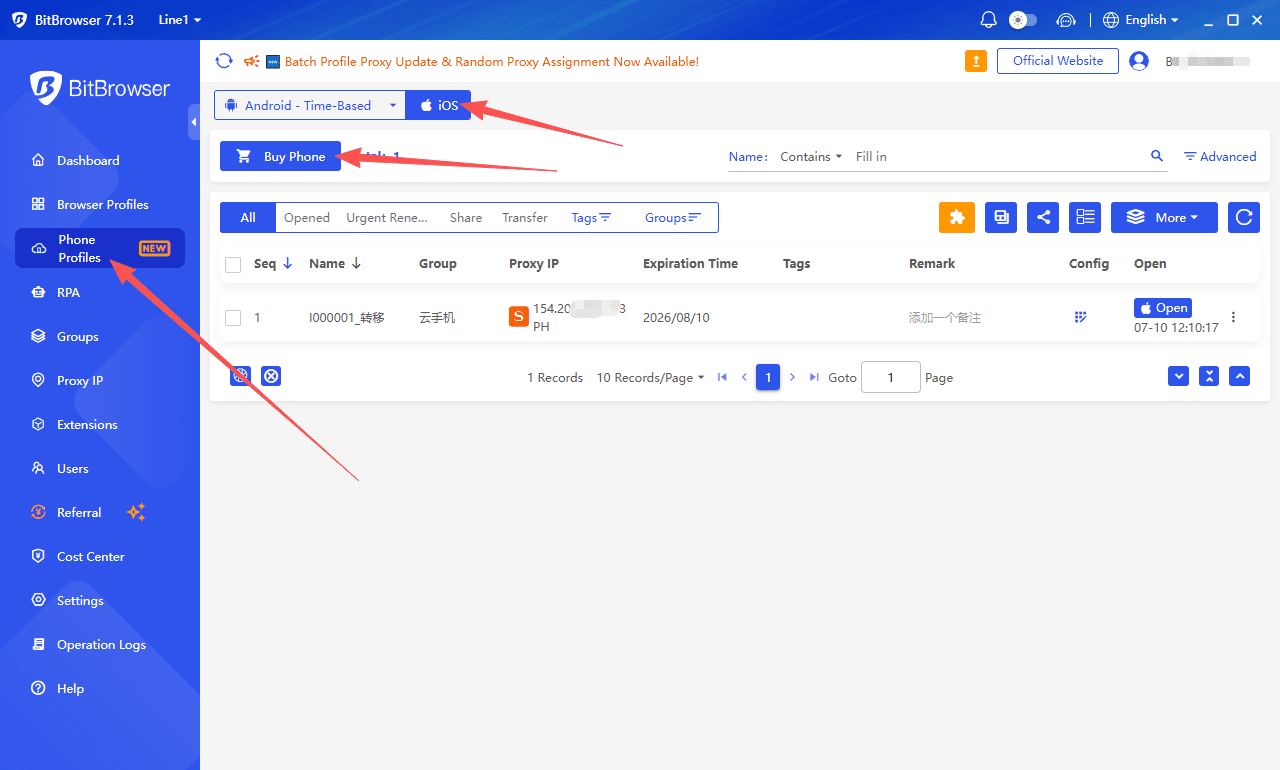
1. Navigate: From the left menu, go to "Phone Profiles" and switch to the "iOS" tab at the top.
2. Purchase: Click the "Buy Phone" button to enter the order page.
3. Customize: The default model is iPhone SE. You can adjust the purchase duration and quantity.
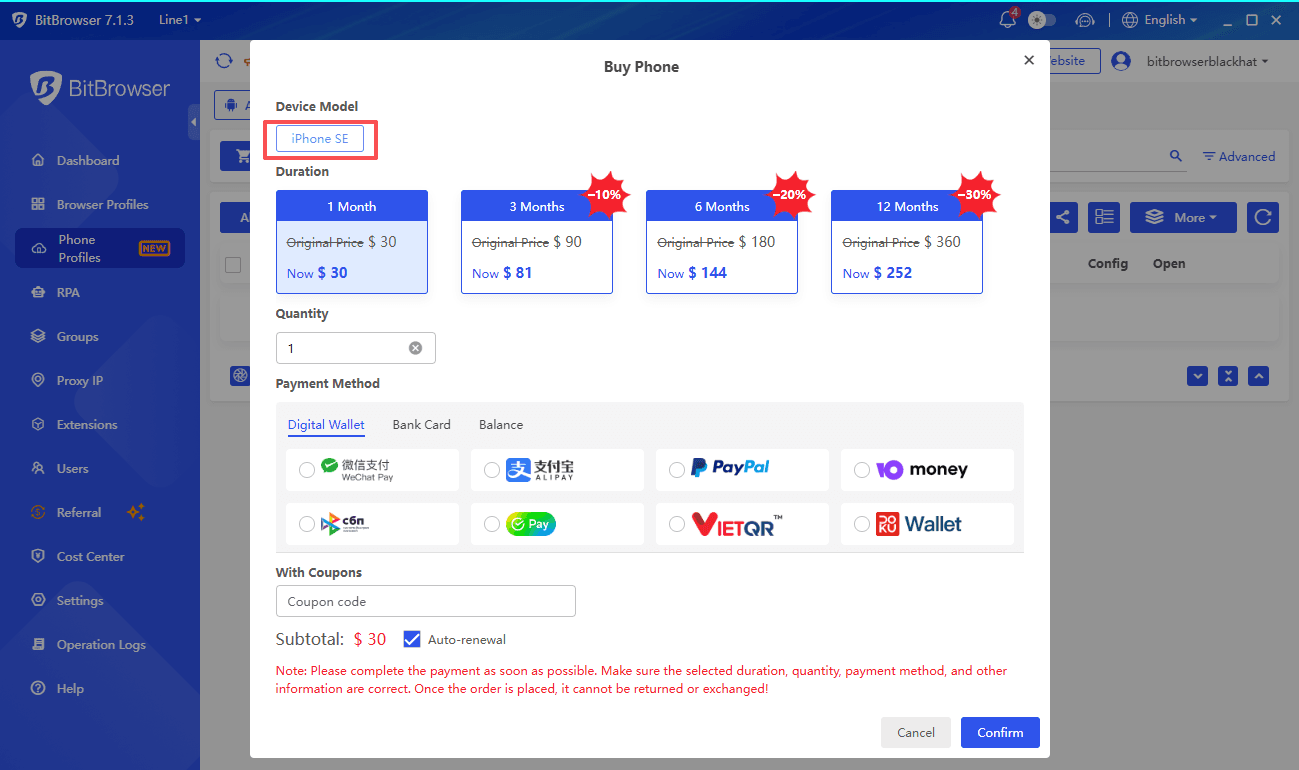
4. Checkout: Select your preferred payment method, review the model, quantity, and total amount.
5. Confirmation: Confirm the order details and complete the payment.
6. Activation: Once the purchase is successful, your new cloud phone will appear in the profile list.
Note: Pricing and offers are subject to change. Please refer to the actual order page in the client for final fees.
🌐 Proxy Configuration (Mandatory Before First Use)
Since the platform does not provide proxy services, you must configure a valid proxy before starting the device for the first time.
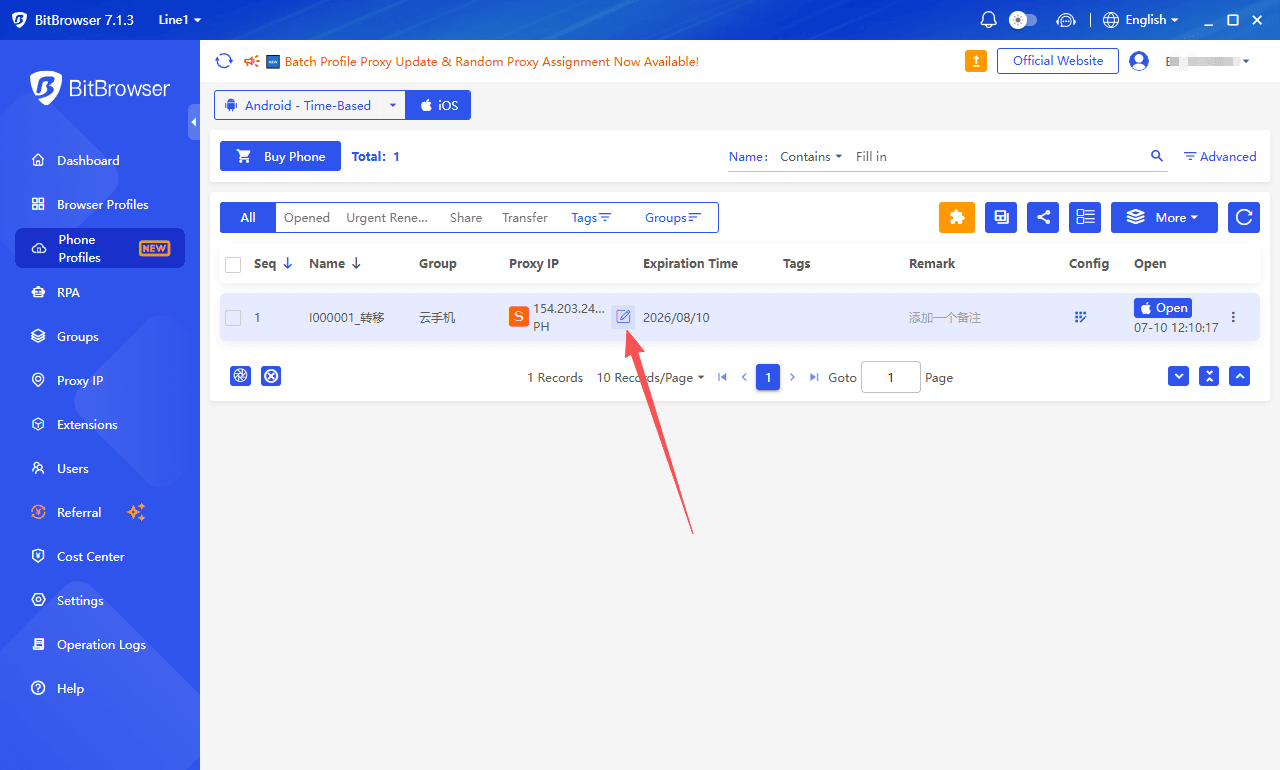
1. Find your purchased phone in the list, hover over "Proxy IP Settings", and click to enter.
2. Fill in the proxy information and click "Check Proxy".
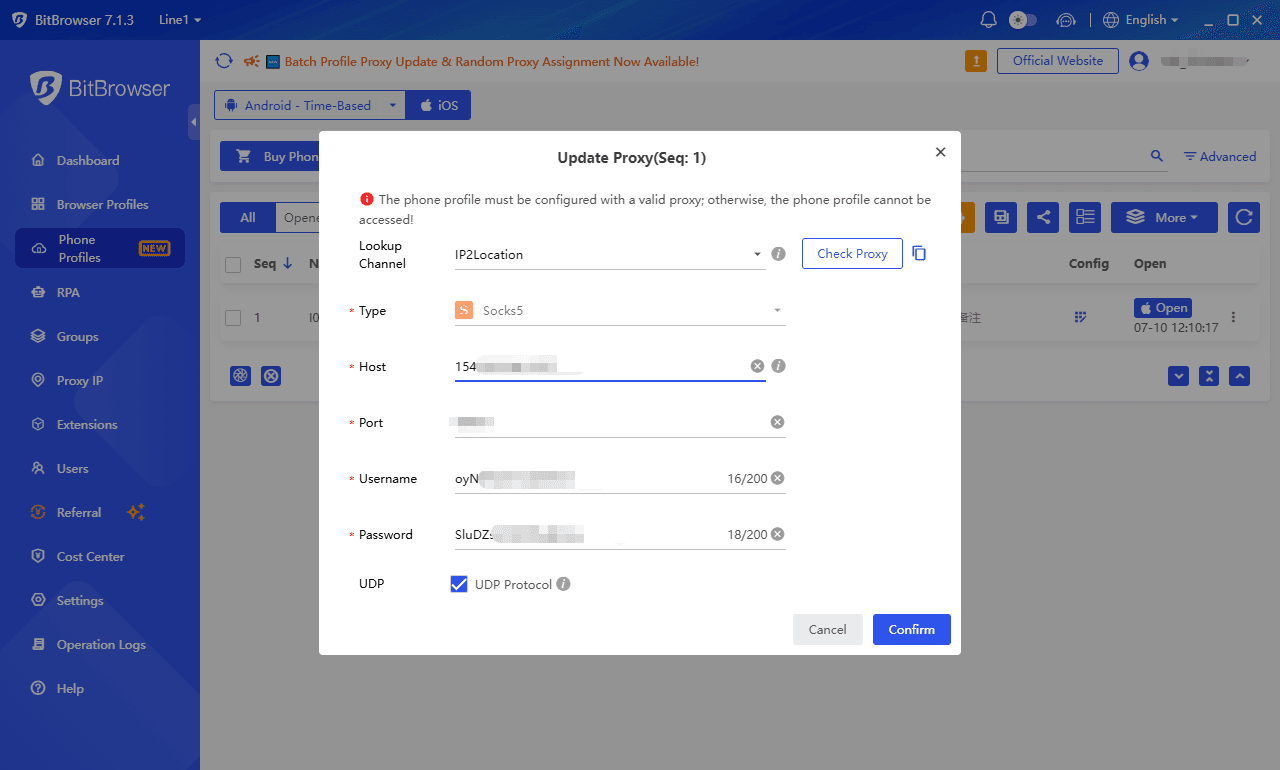
Configuration Tip: Once saved, we highly recommend clicking "Check Proxy" to test the connection. If the proxy network is unreachable, the cloud phone will not be able to boot normally.
Once the test is passed, it is ready to use.
🖥️ Opening & Accessing the iOS Cloud Phone
Once the proxy is configured successfully, return to the phone list and click "Open" on the corresponding device.
· Interface Layout: A separate window will pop up. The left side displays the iOS device screen, while the right side contains the toolbar (including network info, volume controls, power options, file operations, and transfer to real device).
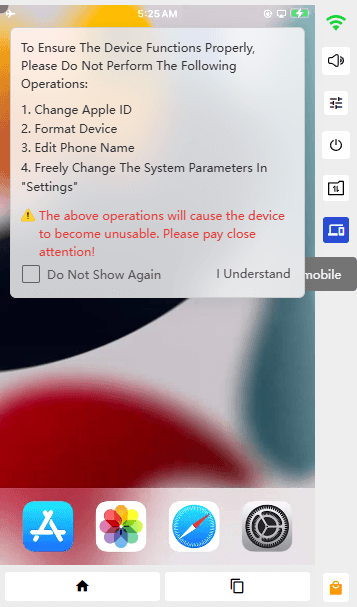
· First Boot: The first launch requires device initialization. The waiting time depends on your current network status.
· Post-Boot Check: After entering the desktop, we recommend opening the built-in browser first to test the network connection and confirm that web pages load properly before installing applications.
Troubleshooting: If the window stays stuck on the loading screen for a long time, return to the phone list and check your proxy settings first. In most cases, an incorrect proxy host, port, or authentication info is the primary cause. Please avoid repeatedly restarting the device without checking the network first.
📦 Internal Features & App Installation
App Store
Install any application just as you would on a physical phone, but with extra efficiency.
1. Tap the "App Store" (Application Market) icon in the lower-right corner of the cloud phone window.
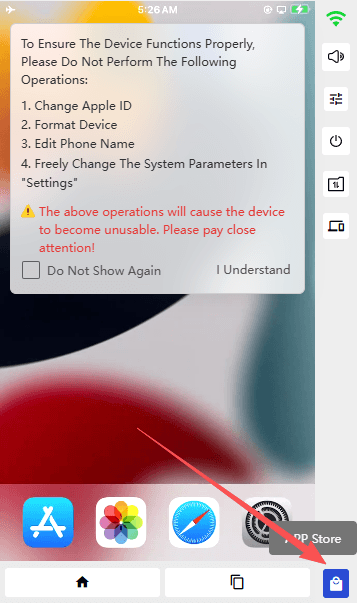
2. Browse the list of available apps.
3. Click the "Install" button next to the desired app.
Transfer to Real Device
Need to move your session to a physical handset? You can seamlessly continue your work on a real device.
1. Click the "Transfer to Mobile" button on the right toolbar of the cloud phone window.
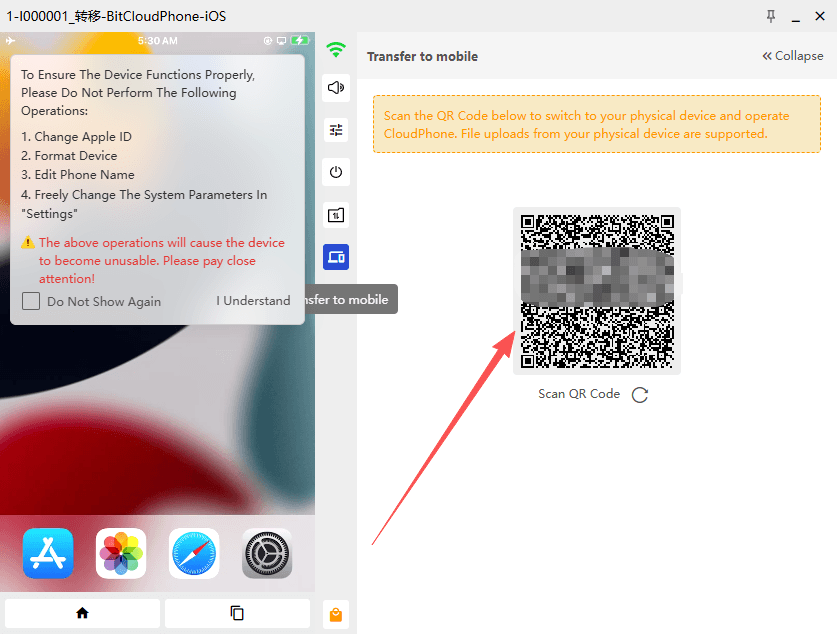
2. Scan the QR code displayed on the page with your physical mobile phone.
3. Follow the on-screen prompts to operate the cloud phone directly on your real device.
4. Bonus: This feature also supports uploading files from your real device directly to the cloud phone.
🛠️ Advanced Management Features (Single & Batch)
We have designed the management console to be intuitive, allowing you to handle both individual and batch operations with ease:
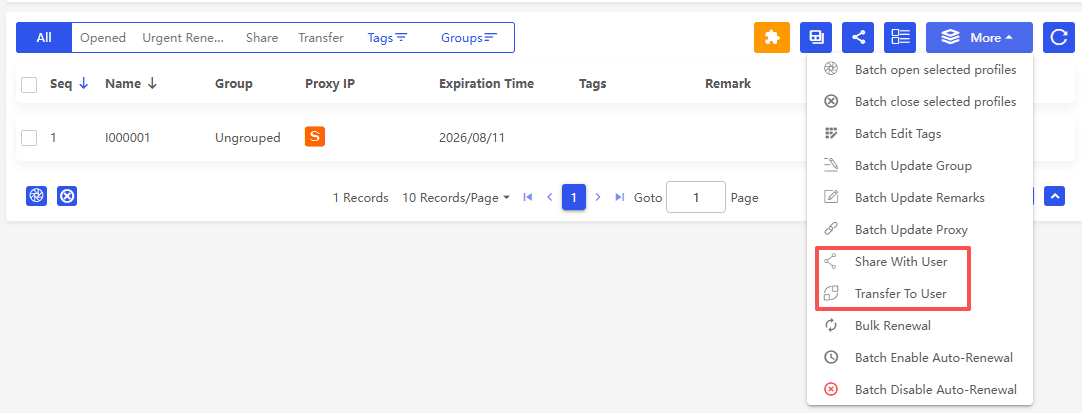
· Edit Tag / Group: Modify individually via hover, or use the "More Actions" button in the upper-right corner for batch modifications.
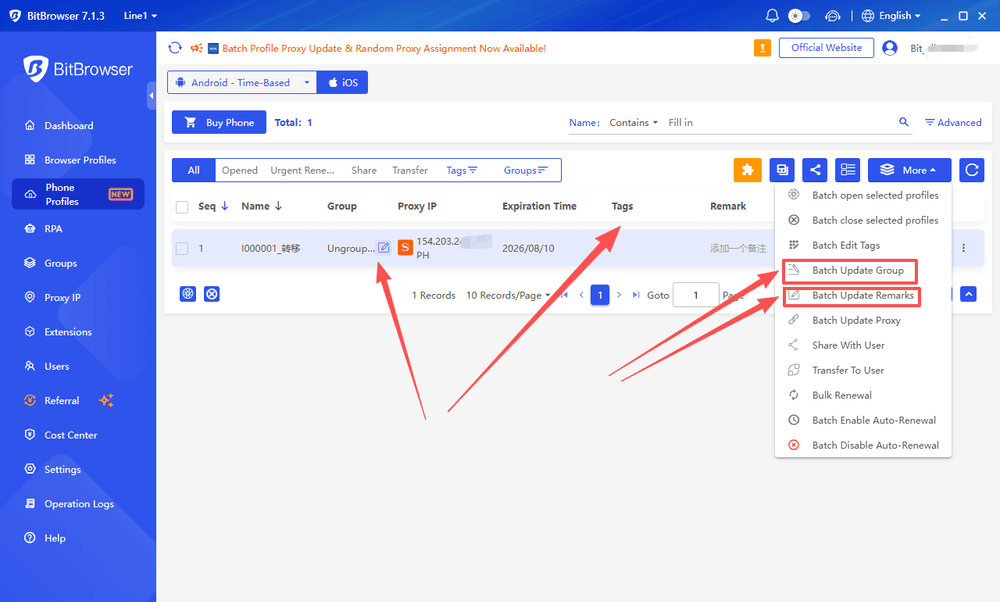
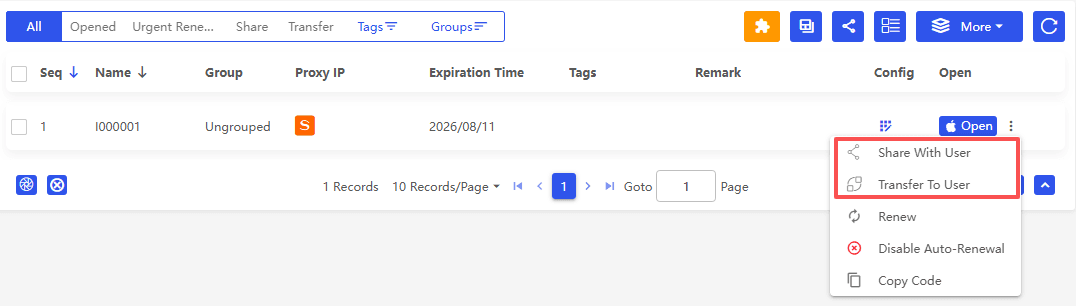
· Transfer & Share: Transfer ownership or share temporary access with team members, supporting both single-selection and batch operations.
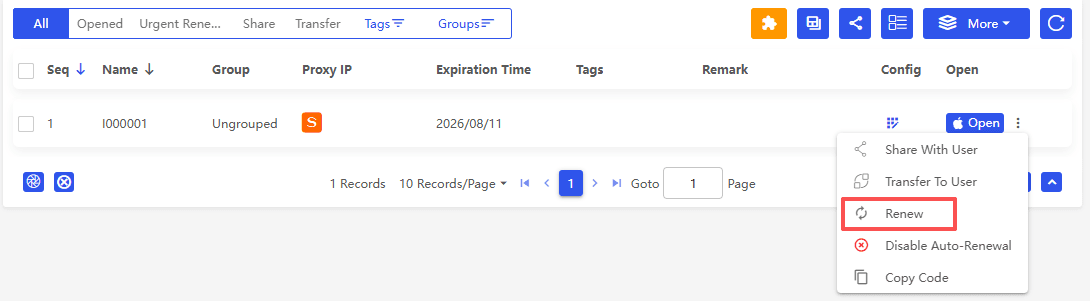
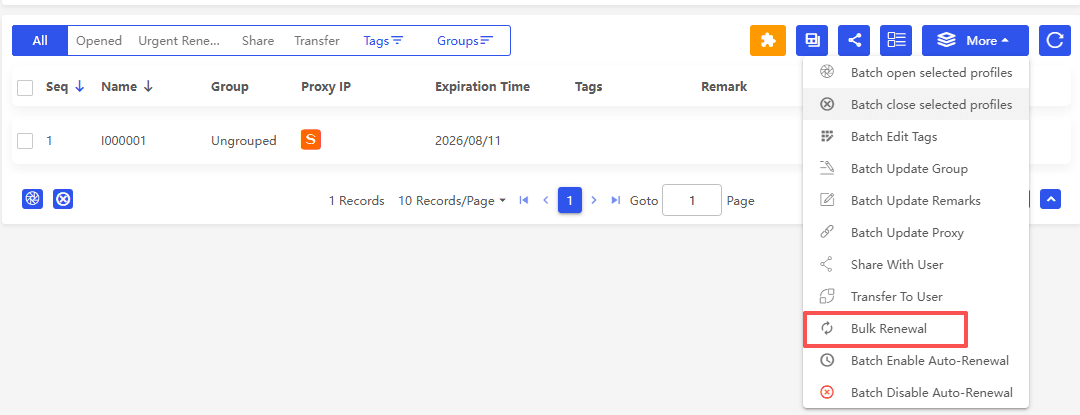
· Renew: Extend your device usage effortlessly, either individually or in bulk via the "More Actions" menu.
Further Reading
BitCloudPhone iOS User Guide: https://doc.bitbrowser.net/cloud-phone/bitcloudphone-ios
BitCloudPhone iOS's Basic Features: https://doc.bitbrowser.net/cloud-phone/bitcloudphone-ios/basic-features
Ready to experience the power of the cloud?
Log in to your BitCloudPhone dashboard, prepare your proxy, and purchase your iOS instance today!
👉Official Registration: https://client.bitbrowser.cn/register

 Multi-Account Management
 Prevent Account Association
 Multi-Employee Management
Recommended
See More