How to Use Camera Live on BitCloudPhone
 2026.11.12 02:17
 YT.Shi
Want to use your computer’s camera and microphone inside a cloud phone? Camera Live on BitCloudPhone lets you send local audio and video into a supported Android cloud phone environment.
Before You Start
Prepare the following:
▸ A camera and microphone connected to your computer.
▸ A BitCloudPhone Android environment using Global15-live or Global16-live.
▸ The app and account you plan to stream with, including any live streaming access required by that platform.
Camera Live supplies the audio and video input. You still start and manage the broadcast inside your chosen app.
How to Set Up Camera Live
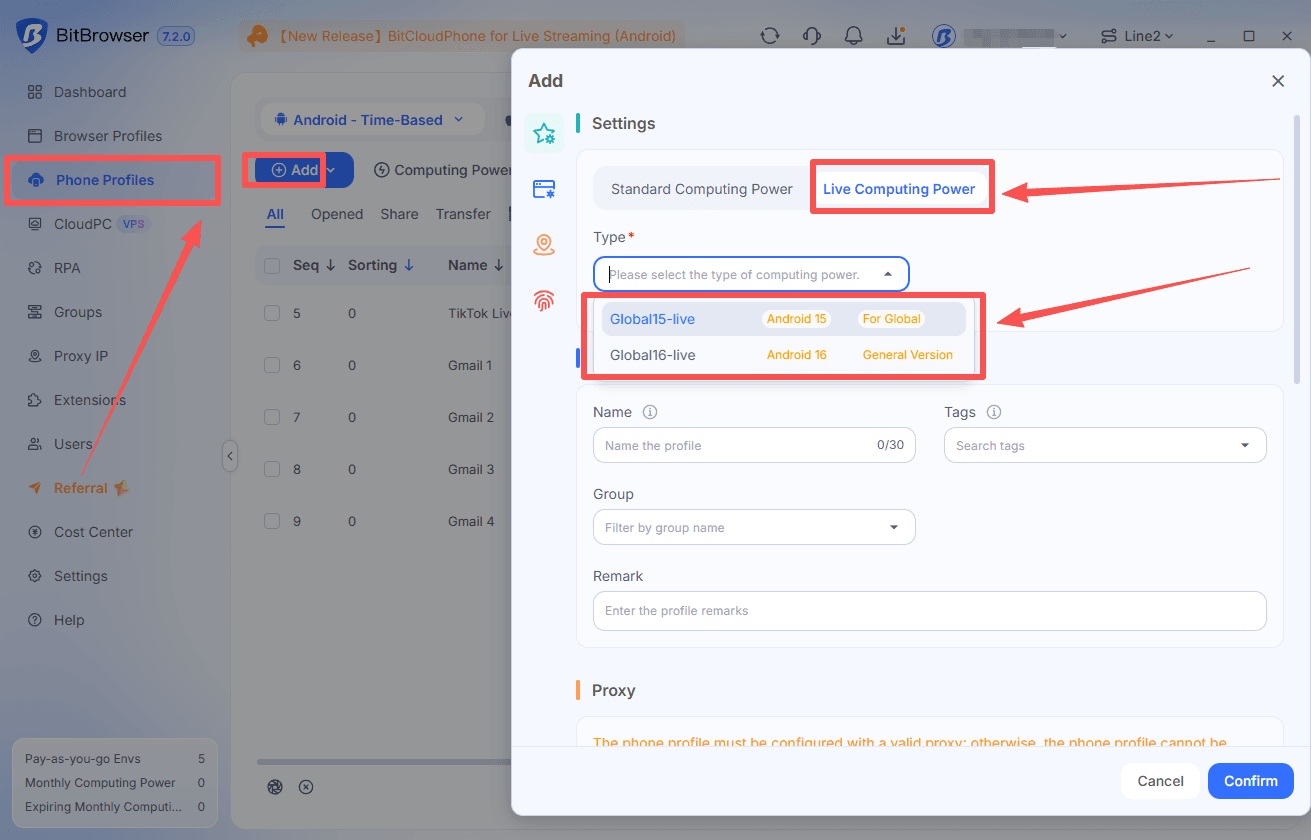
1. Choose Live Computing Power
When creating or configuring your cloud phone environment, choose a supported Live Computing Power option:
▸ Global15-live: Android 15.
▸ Global16-live: Android 16.
Check that you have selected a live option before continuing. For more details, see the Live Computing Power update guide.
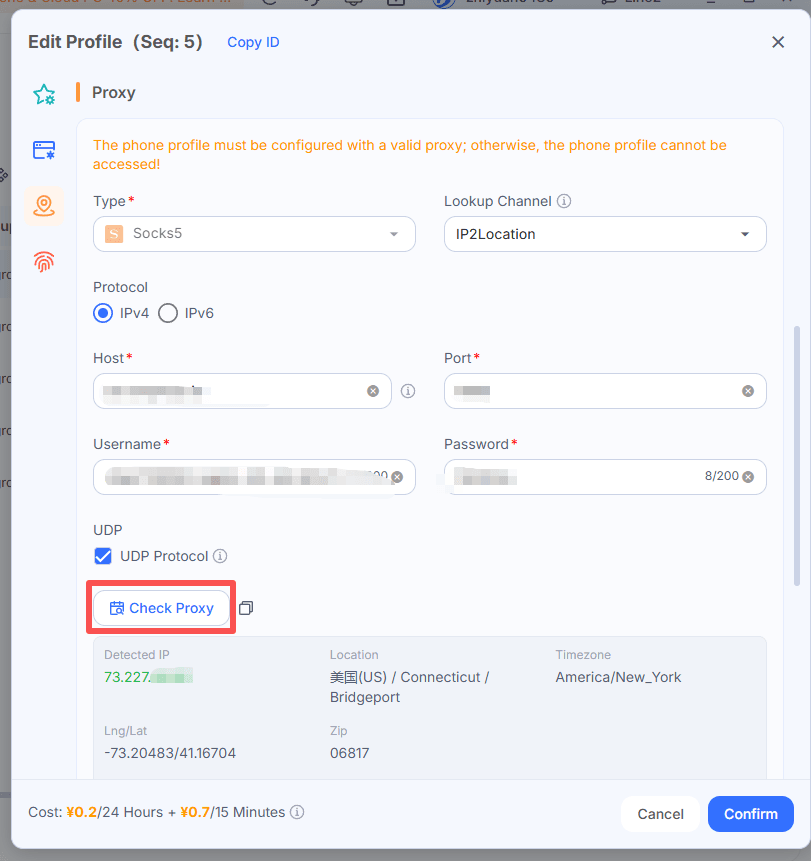
2. Connect Your Camera and Microphone
Before opening your newly created cloud phone profile, check that the proxy is configured correctly. Incorrect proxy settings can cause network connection issues.
Connect your camera and microphone and check that they work on your computer.
If you have multiple cameras or microphones, identify the devices you want to use. For example, you can use a USB webcam for video and a separate microphone for clearer audio.
3. Select Your Audio and Video Source
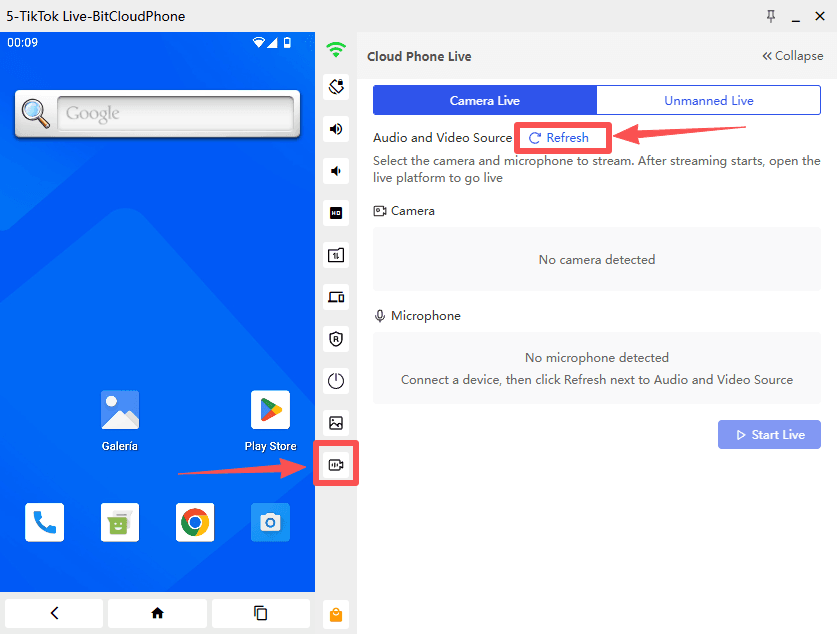
Open your live streaming cloud phone environment and access Camera Live. Under Audio and Video Source, select your camera and microphone.
If a connected device is missing, click Refresh next to Audio and Video Source, then check the list again.
4. Start the Input and Check the Camera Preview
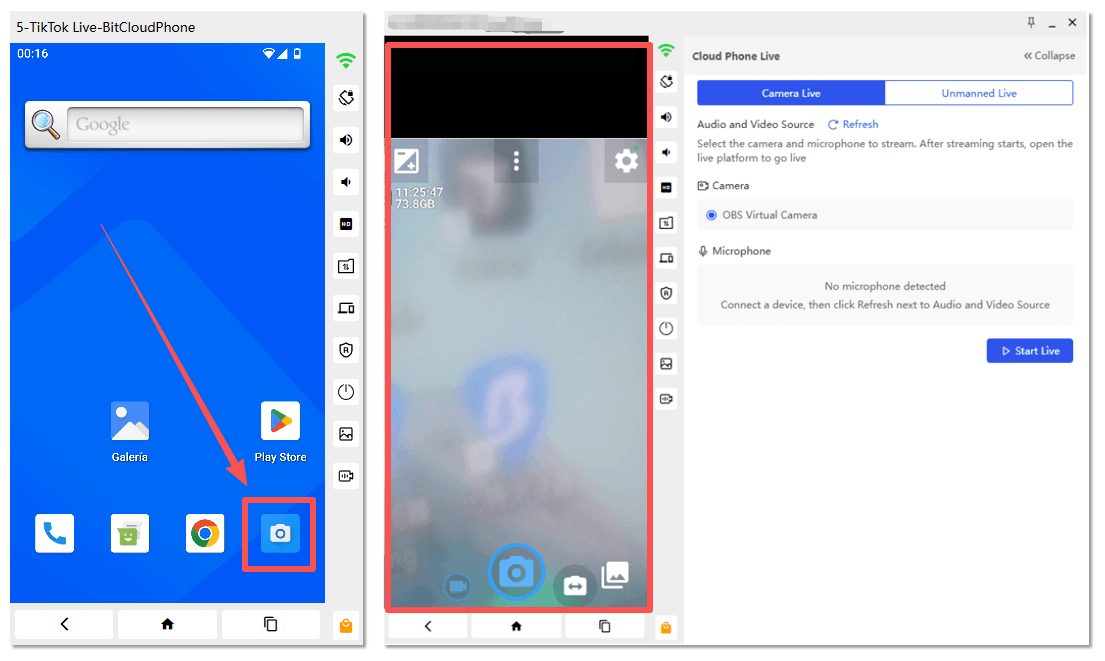
Start streaming from the Camera Live controls, then open the Camera app on your cloud phone to check the picture and framing.
Once the picture looks right, open your chosen live streaming app. Check the audio using its preview or test options, where available, before going live.
5. Begin Your Broadcast on TikTok
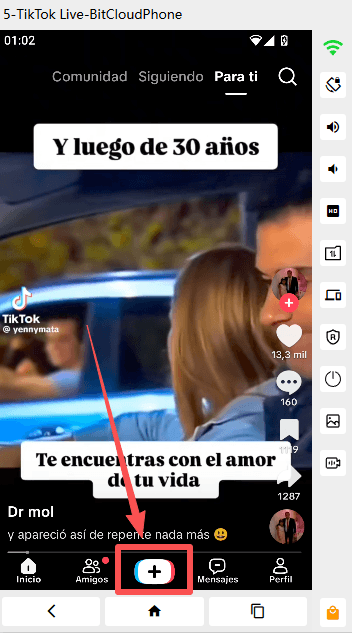
Once the camera preview looks right, open TikTok on your cloud phone and sign in.
1. Tap the + button at the bottom of the screen.
2. Select LIVE at the bottom of the screen. Scroll across the options if needed.
3. Add a title and adjust the available broadcast settings.
4. Check the preview, then tap Go LIVE to begin.
Keep Camera Live running and your camera and microphone connected throughout the broadcast. If the LIVE option is missing, check whether your account has access to TikTok LIVE.
Troubleshooting Camera Live
My Camera or Microphone Is Not Listed
Check the device connection and confirm that your computer recognizes it. Then return to Audio and Video Source and click Refresh.
The Picture Works, but There Is No Sound
Check which microphone is selected and whether it is muted. Test it on your computer, then review the microphone permissions and audio settings in the cloud phone app.
The App Does Not Let Me Go Live
Check the app’s live streaming requirements and your account’s eligibility. Camera Live provides an input source; it does not enable live streaming access for an account that does not have it.
The Issue Continues After Checking the Settings
Contact technical support with your computing power type, app name, selected camera and microphone, and a screenshot of the issue. You can reach the team on Telegram.
Want to Use a Video File Instead?
Unmanned Live lets you use an uploaded MP4 video as the cloud phone’s camera source instead of a connected camera.
1. Open Unmanned Live
In the Cloud Phone Live panel, select Unmanned Live.
2. Upload Your Video
Click Upload Video and choose a file from your computer. Check these requirements before uploading:
▸ MP4 format only.
▸ Filename: 60 characters or fewer, including the extension.
▸ No single quotes (') in the filename.
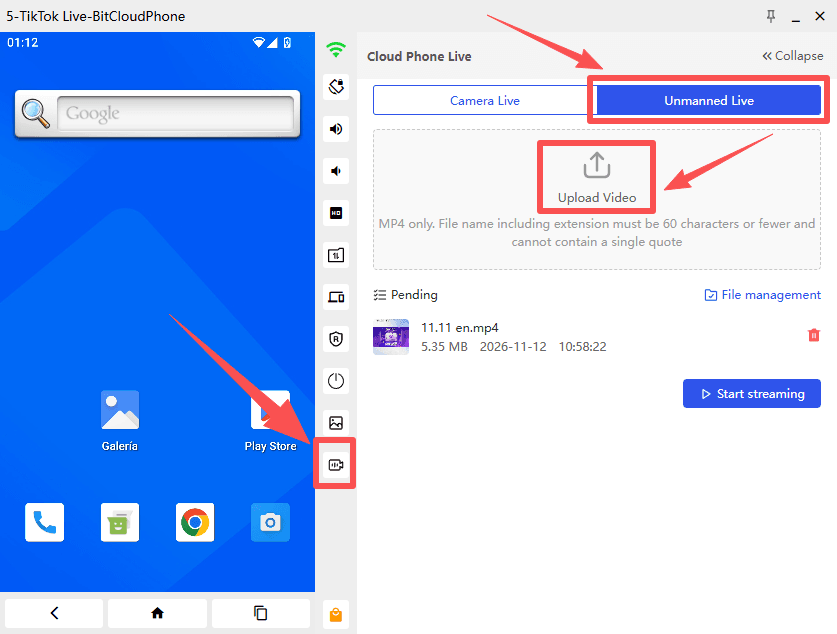
Use File management to review previously uploaded videos.
To use a previously uploaded video, select the file, and click Add to pending to add it to the pending list.
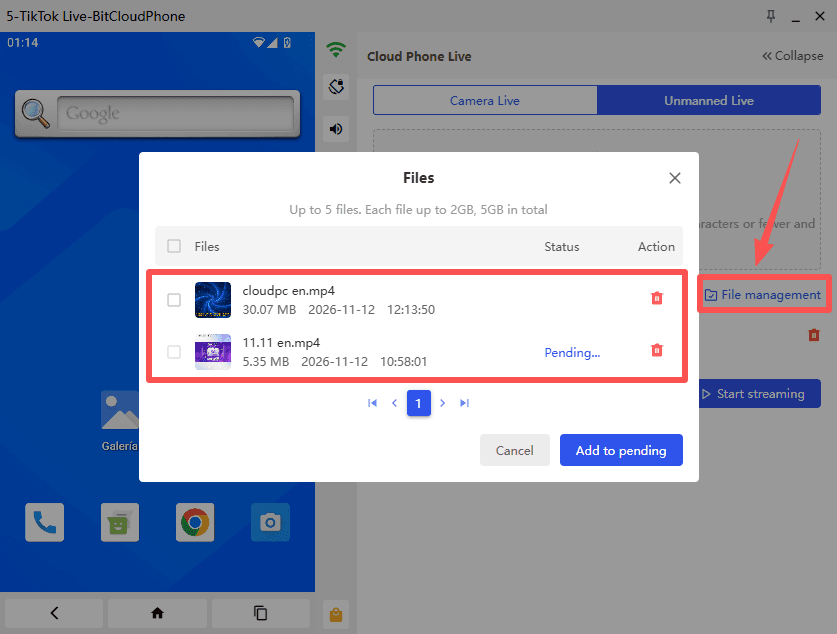
3. Start Streaming and Check the Picture
Click Start Streaming to begin sending the video to your cloud phone. The status changes to Streaming... when the input is active.
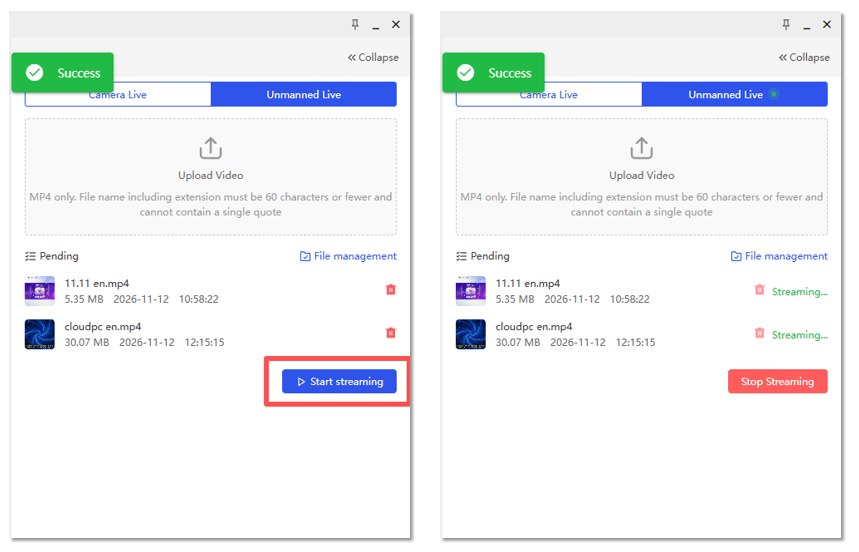
Open the Camera app on your cloud phone to check the picture before opening your live streaming app.
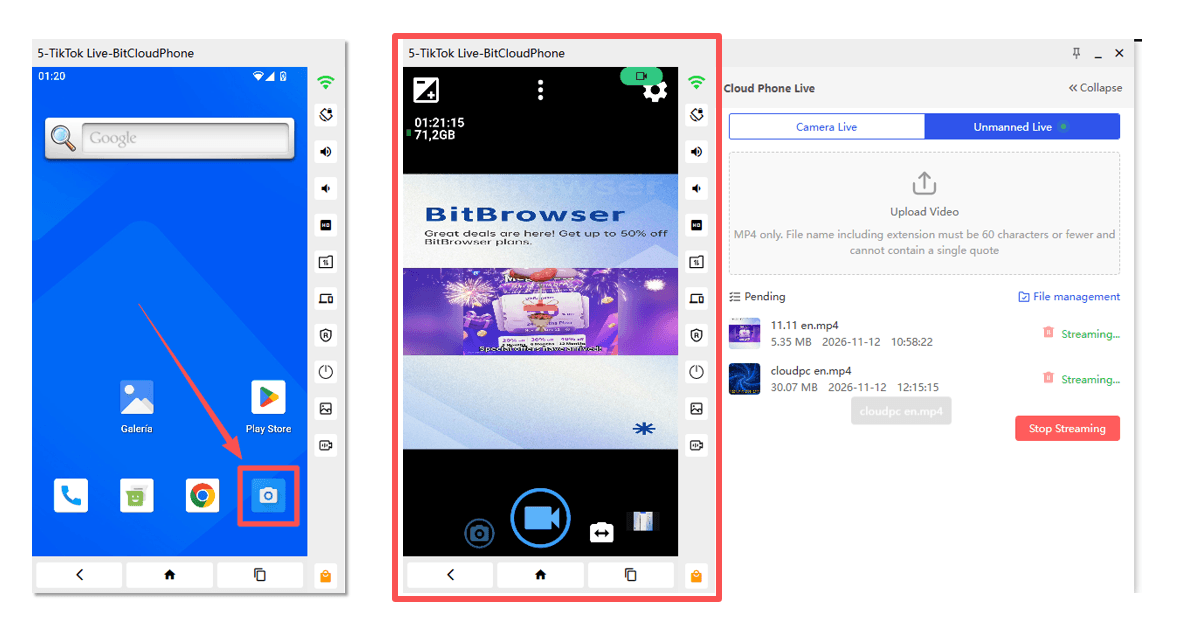
4. Begin Your Broadcast
For TikTok, tap +, select LIVE, add a title, and check your broadcast settings. Then tap Go LIVE.
Keep Unmanned Live running throughout the broadcast. Sending video to the cloud phone does not automatically start a TikTok LIVE session.
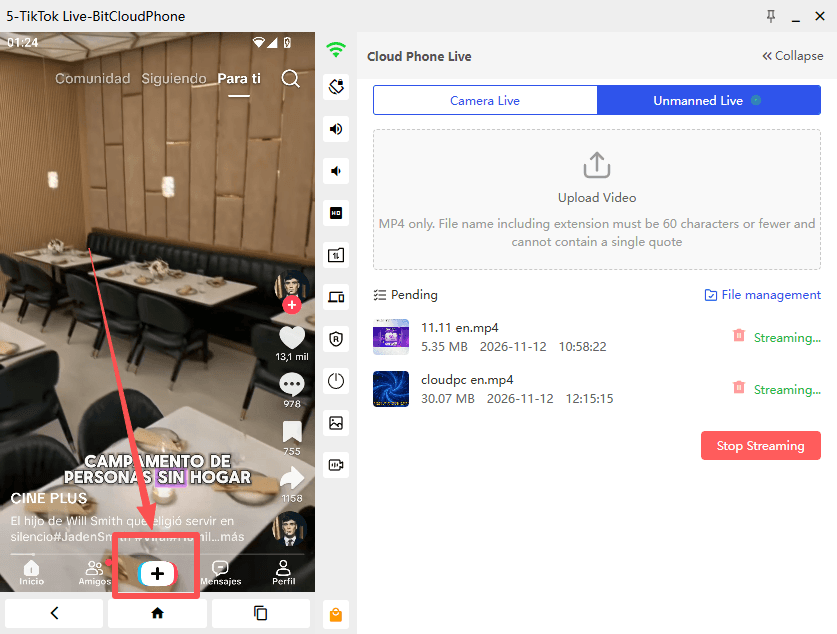
5. Stop the Video Input
When finished, end the broadcast in TikTok first, then click Stop Streaming in the Cloud Phone Live panel.
Use videos you own or have permission to stream, and follow the platform’s rules for prerecorded content.
Try Camera Live on BitCloudPhone
Choose a supported live environment, connect your camera and microphone, and test the input in your preferred app before your first broadcast.

 Multi-Account Management
 Prevent Account Association
 Multi-Employee Management
Recommended
See More